FREE / PRO label
Next to the name of the app. It shows the plan that is active in this browser: FREE or PRO.
User manual · Ashes VFX 3.2
Ashes VFX turns an image, a text, a 3D text, a 3D model or a video into dust. This manual says what each control is for, in the same order as the app. Use the menu to go to a section, or type the name of a control in the search box.
Five steps from a picture to a video of dust. You do not need to read the rest of this manual to make your first export.
The same steps are inside the app: press Quick start in the header. Your files never leave your computer: the app works inside your browser. Use Chrome or Edge.
The app has one window with five areas. The numbers in the picture are explained below it.
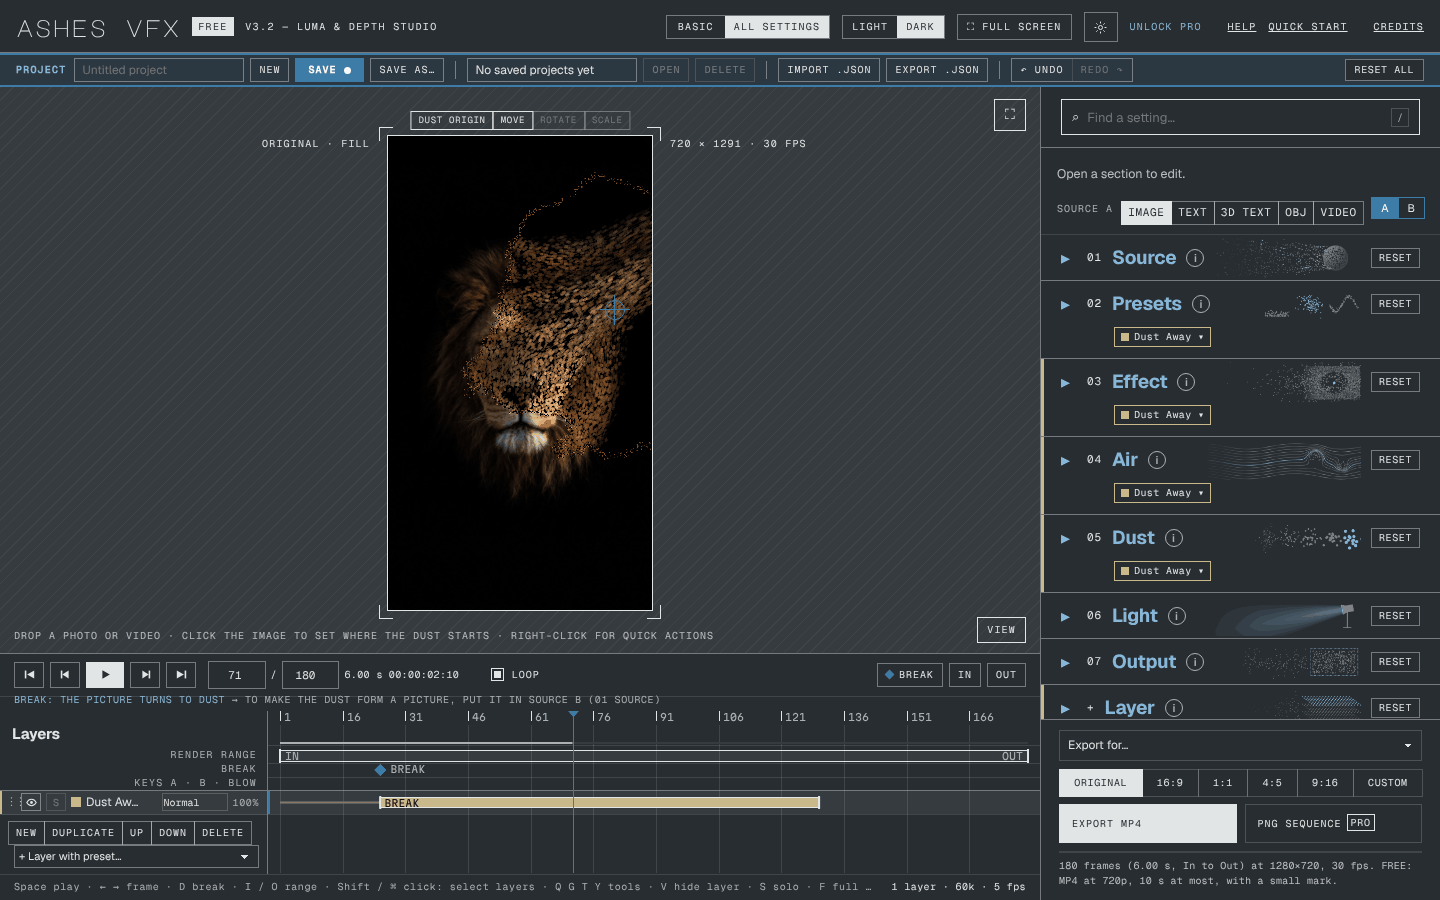 12345678910
The bar at the top of the window.

Next to the name of the app. It shows the plan that is active in this browser: FREE or PRO.
Shows a short panel with the most used controls. Good for your first projects.
Shows every control in every section, and the sections + Layer and + Blow.
Tip If you cannot find a control from this manual, switch to All settings or use Find a setting.
The theme of the interface. It does not change your picture or your export. The app starts in Dark.
Shows only the viewer, as big as the window. Press it again, or Esc, to go back. There is a second small button for this in the top right corner of the viewer.
Shortcut: F
Opens the preferences: text size, accent colour, theme, panel view and more. See Preferences.
Opens the PRO window. There you can buy PRO or paste your license key. When PRO is active the button shows PRO ✓. See FREE and PRO.
Opens this manual in a new tab.
Opens a short list of first steps inside the app.
Opens Credits & licenses: the open-source works that the app uses, with their authors and licenses.
A project keeps everything: the source files, all the settings, the layers and the timeline. Projects and files explains where projects are stored.
The name of this project. Save keeps the project under this name. Press Enter in the field to save.
Up to 40 characters
Starts a new project: everything goes back to the start. The app asks first.
Saves the project in this browser under its name. A small dot on the button means there are changes that are not saved yet.
Saves a copy of the project under a new name.
The projects saved in this browser. Choose one, then press Open or Delete.
Opens the project chosen in the list, with its files.
Deletes the project chosen in the list and the copies of its files.
Opens a project file (.json) from your disk. The file has the settings but not the media: the app asks you to locate the photo or video one time.
Saves the project as a file (.json) on your disk. Use it to keep a backup or to move a project to another computer.
Goes back one step, or forward again.
Shortcuts: Ctrl / ⌘ + Z undo · Ctrl / ⌘ + Shift + Z or Ctrl / ⌘ + Y redo
Puts every section, on every layer, back to the values of a new project. Your photo, video, text, model and the timeline stay. Recorded blows are deleted. The app asks first, and Undo brings everything back.
The viewer shows the frame you will export. The area around the frame is not exported.
Click the picture to set where the dust starts (the dust origin). Right-click for quick actions. Drag while it plays to record a blow. Shift + drag moves the image. You can also drop a photo, a video or a 3D model on the viewer to open it.
The label at the left shows the format and the fit (for example Original · Fill). The label at the right shows the size of the export in pixels and the frame rate.
The tools are at the top of the frame. They choose what a click or a drag on the picture does.
Click the picture to set the point where the dust starts. It is used when Direction in 03 Effect is From a point. A small cross marks the point.
Shortcut: Q
Drag to move the source left, right, up and down. Alt + drag, or the mouse wheel, changes the depth (Z). Double-click resets the position.
Shortcut: G
Drag to turn (Y) and tilt (X) the source. Shift + drag rolls it (Z). Double-click resets the rotation.
Shortcut: T
Drag up or down to change the size. Double-click resets the scale.
Shortcut: Y
They appear when Source B has something in it. They choose which source Move drags: Source A or Source B. While you drag, the viewer shows MOVING A or MOVING B.
A photo or a video has only position and depth, so Rotate and Scale are grey for them. A move never makes a key by itself: see Keys.
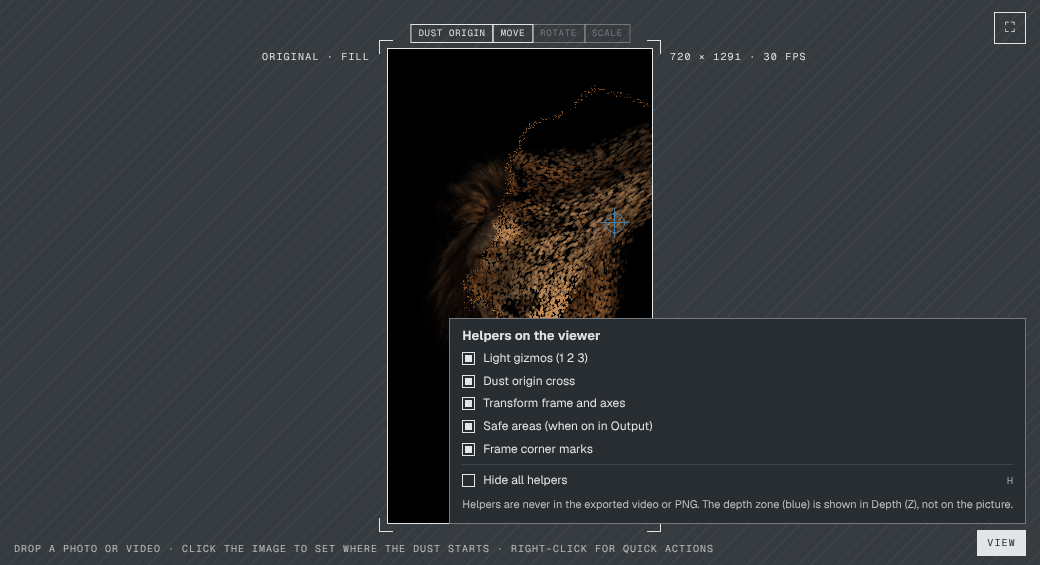
A menu at the bottom right of the viewer. It shows or hides the helpers that are drawn over the picture. Helpers are never in the exported video or PNG.
The numbered marks of the lights of 06 Light. Drag a mark to move its light.
The cross that marks where the dust starts.
The frame and the axes around a text or a 3D object.
The Reels / TikTok safe area, when it is on in 07 Output.
The small marks at the four corners of the frame.
Hides all the helpers with one click.
Shortcut: H
Source A is what turns to dust: an image, a text, a 3D text, a 3D model or a video. Source B is optional: it is what the dust turns into. This chapter is about Source A. Source B has its own chapter.
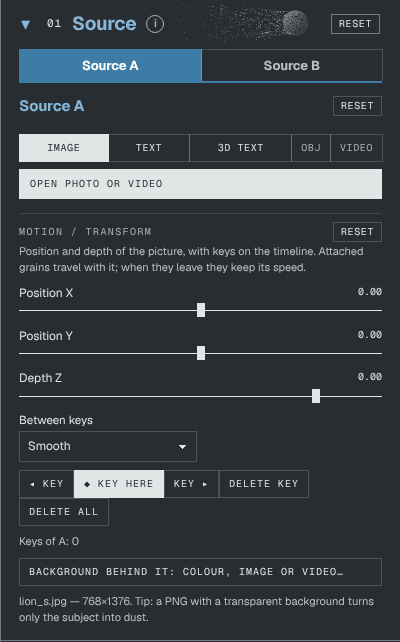
Two tabs at the top of the section. Each tab has its own kind of source, its own files and its own Motion / Transform. The tab Source B shows ON when B has something in it.
The kind of Source A. Click one to change it. The controls under it change with the kind.
When 01 Source is closed, a thin row above the sections shows the kind of Source A and the buttons A and B. One click changes the source and opens 01 Source on that tab.
Puts Source A back to its default values. The file, the text and the typeface stay. If there are keys, the app asks before it removes them.
A shortcut. It opens 07 Output at Background, where you choose what is behind the source.
Opens a file from your computer as Source A. In the Video tab the button is called Open video. You can also drop the file on the viewer.
Photos: the image formats your browser can open (JPG, PNG, WebP…). Video: MP4, MOV, WebM, M4V.
Tip A picture with a black or transparent background works best: only the subject turns to dust. For a black background see Remove dark background.
What the video does after its last frame: Freeze the last frame or Loop the video.
Plays the video from the end to the start.
Position and depth of the picture, with keys on the timeline. Grains that are still part of the picture travel with it. When they leave, they keep its speed.
Moves the picture left (−) or right (+).
−2.5 to 2.5 · default 0
Moves the picture down (−) or up (+).
−1.8 to 1.8 · default 0
Moves the picture away from you (−) or towards you (+). Far is smaller, near is bigger.
−4 to 0.85 · default 0
How the value changes from one key to the next: Smooth (slow start and end) or Linear (constant speed).
Makes a key on the current frame with the position you see. Makes a key on this frame. Moving a slider or dragging in the viewer never makes a key by itself. How keys work.
Go to the previous or the next key.
Delete key removes the key on the current frame. Delete all removes every key of this source.
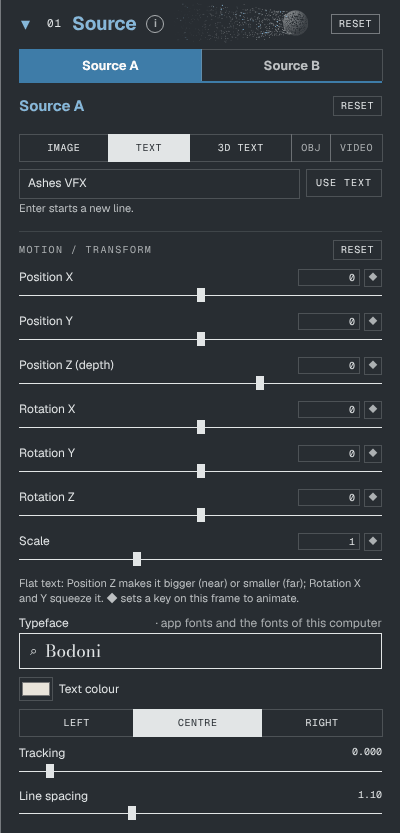
Type the text and press Use text. Enter starts a new line.
Up to 200 characters · Ctrl / ⌘ + Enter = Use text
Opens the list of fonts: the fonts of the app and the fonts of this computer. Type in the list to search. At the bottom of the list, Show the fonts of this computer asks the browser for permission to read your fonts (Chrome and Edge ask one time; your fonts never leave the computer), and Load font file (.ttf / .otf / .woff) opens a font file from your disk.
Tip Display fonts with thick strokes give more grains and a clearer shape.
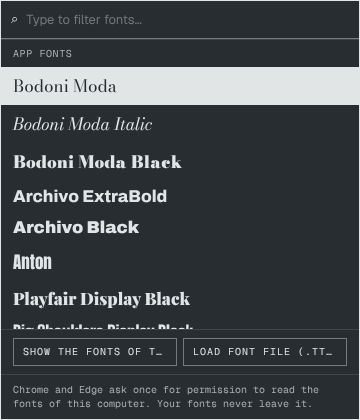
The weight or italic of the typeface. It appears when the chosen family has more than one style.
The colour of the letters. The grains take this colour.
The alignment of the lines of the text.
The space between the letters.
−0.05 to 0.6 · default 0
The space between the lines.
0.7 to 2 · default 1.10
A text, a 3D text and a 3D model have a full transform: position, rotation and scale. Each kind of source keeps its own transform. Each row has a number field, a slider and a small ◆ button.
Move the source left and right (X), up and down (Y).
X −3 to 3 · Y −2 to 2 · default 0
Moves the source away (−) or towards you (+). A flat text gets smaller or bigger.
−4 to 2 · default 0
Tilt (X), turn (Y) and roll (Z), in degrees. On a flat text, Rotation X and Y squeeze it.
−180° to 180° · default 0
The size of the source.
0.05 to 3 · default 1
On: one Scale for the three axes. Untick it to scale X, Y and Z apart with Scale X, Scale Y and Scale Z.
Makes a key on this frame. One key holds position, rotation and scale together.
Back to the centre, no rotation, scale 1. If it has keys, the app asks first.
For a Text, a 3D Text and an OBJ. Ready-made moves that play before the break, without keys.
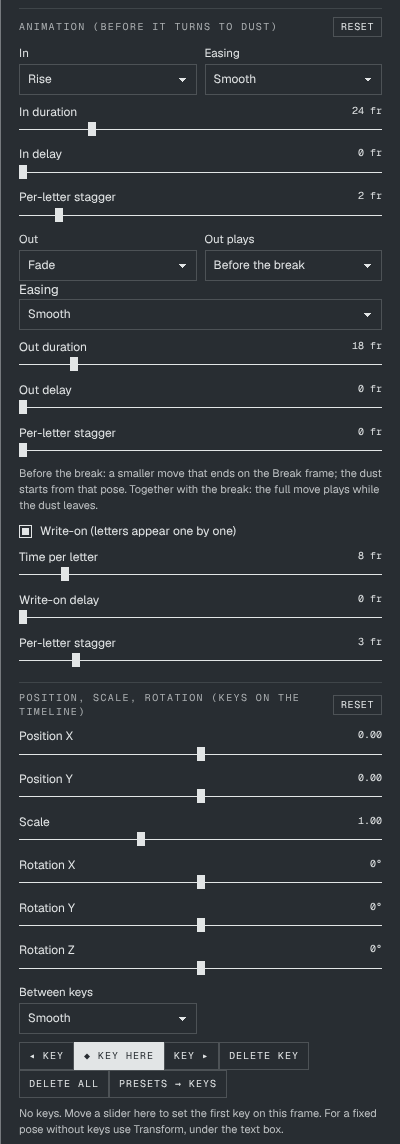
How the source appears at the start: None, Fade, Rise, Drop, Scale up, Slide from left, Slide from right, Spin in, Typewriter (per letter) or Letters cascade.
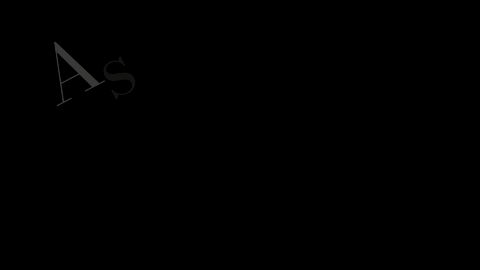 frame 4
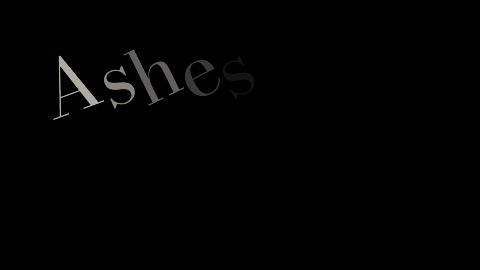 frame 10
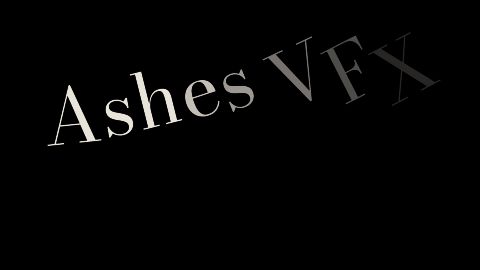 frame 17
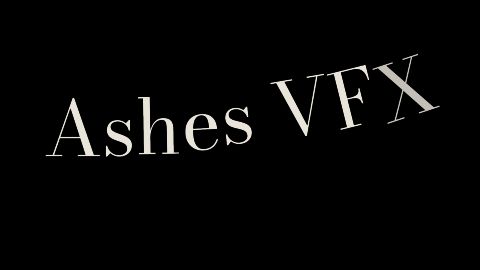 frame 25
The feel of the move: Smooth, Snappy or Bounce.
How long the In move lasts.
1 to 120 frames · default 24
How many frames the In move waits before it starts.
0 to 120 frames · default 0
The delay from one letter to the next. With 0 all the letters move together.
0 to 20 frames · default 2
The move at the end: To dust (no move), Fade, Sink, Scale down, Slide or Spin out.
Before the break: a smaller move that ends on the Break frame; the dust starts from that pose. Together with the break: the full move plays while the dust leaves.
Smooth, Snappy or Bounce.
The same three times as for In, for the Out move.
Duration 1 to 120 fr (default 18) · delay 0 to 120 fr · stagger 0 to 20 fr
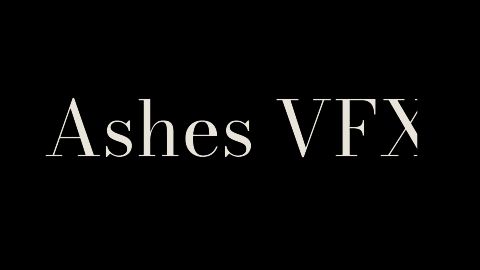
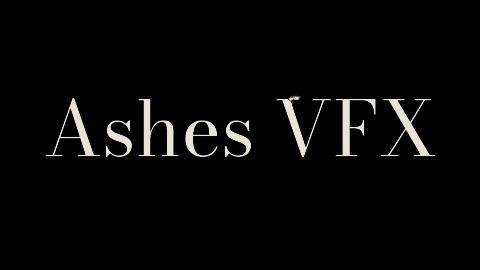
The text is written letter by letter.
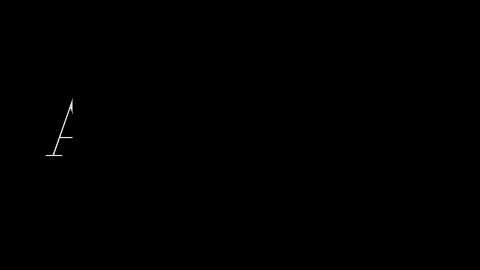 frame 5
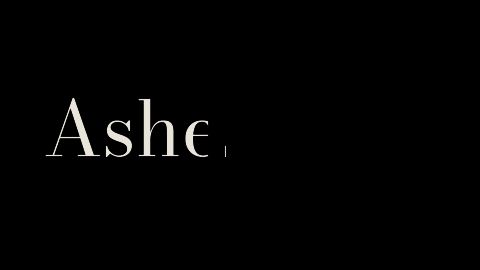 frame 15
 frame 27
 frame 41
How long each letter takes to appear, how long the write-on waits before it starts, and the delay from one letter to the next.
Time per letter 1 to 60 fr (default 8) · delay 0 to 120 fr · stagger 0 to 20 fr (default 3)
The key sliders of the animation: Position X, Y and Z, Scale and Rotation X, Y, Z, with Between keys (Smooth or Linear) and the buttons ◂ Key, ◆ Key here, Key ▸, Delete key and Delete all. For a fixed pose without keys use Motion / Transform.
Writes the In and Out presets as keys, so you can edit them by hand.
A text with depth, bevels, materials and its own lights. The app renders the 3D text, and that render is what turns to dust.
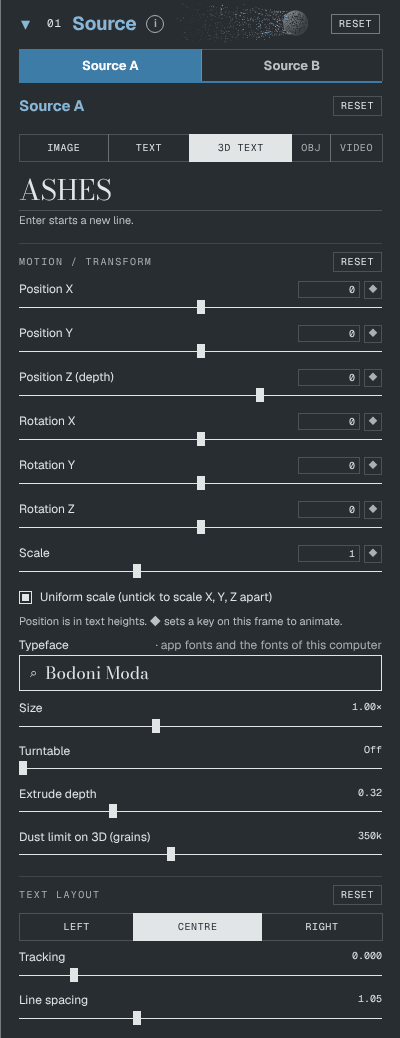
Type the text. Enter starts a new line. The 3D text updates by itself.
Up to 200 characters
The same font list as for Text. Some fonts cannot be turned into 3D shapes (for example font collections, .ttc). Then a message appears under the button and the 3D text keeps the font it had.
The size of the 3D text or model in the frame.
0.4× to 2× · default 1×
The object turns by itself around its vertical axis. The value is the speed.
Off, or 1 to 90 degrees per second
How thick the letters are, from front to back.
0.02 to 1.2 · default 0.32
The largest number of grains for a 3D source. More grains give finer dust, but the app is slower.
100k to 700k · default 350k
Tip Work at 350k. Go up to 700k only for the final render.
The alignment of the lines of the 3D text.
The space between the letters.
−0.1 to 0.6 · default 0
The space between the lines.
0.6 to 2 · default 1.05
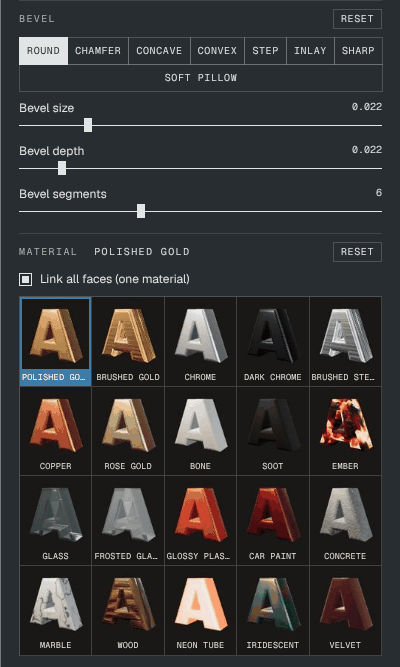
The shape of the edge of the letters: Round, Chamfer, Concave, Convex, Step, Inlay, Sharp or Soft pillow.
 Round
 Chamfer
 Step
 Inlay
 Sharp
How wide the bevel is. With 0 the edge is square.
0 to 0.12 · default 0.022
How deep the bevel goes, from front to back.
0 to 0.2 · default 0.022
How many steps draw the bevel. More segments give a smoother curve.
1 to 16 · default 6
Click a ball to use that material: Polished Gold, Brushed Gold, Chrome, Dark Chrome, Brushed Steel, Copper, Rose Gold, Bone, Soot, Ember, Glass, Frosted Glass, Glossy Plastic, Car Paint, Concrete, Marble, Wood, Neon tube, Iridescent and Velvet. The name of the material in use is next to the title.
 Polished Gold
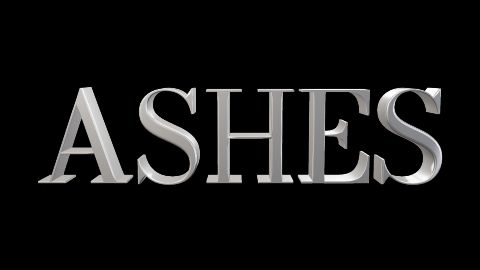 Chrome
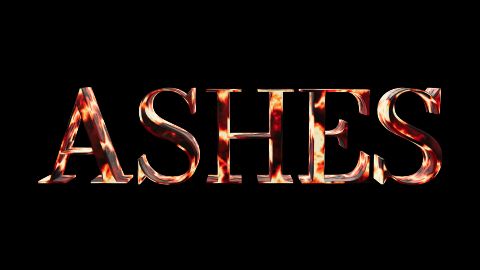 Ember
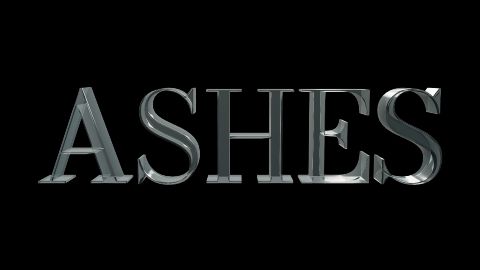 Glass
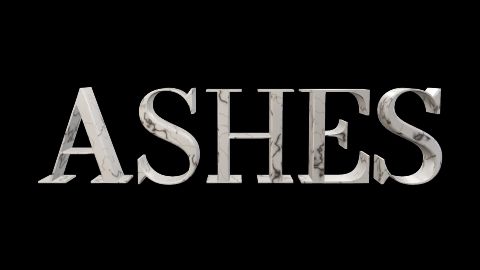 Marble
 Neon tube
On: the whole text uses one material. Off: you can give a different material to each part. Then four buttons appear: Front, Bevel, Sides and Back. Choose a part, then click a material.
The materials you saved with Save material. They appear under the library.
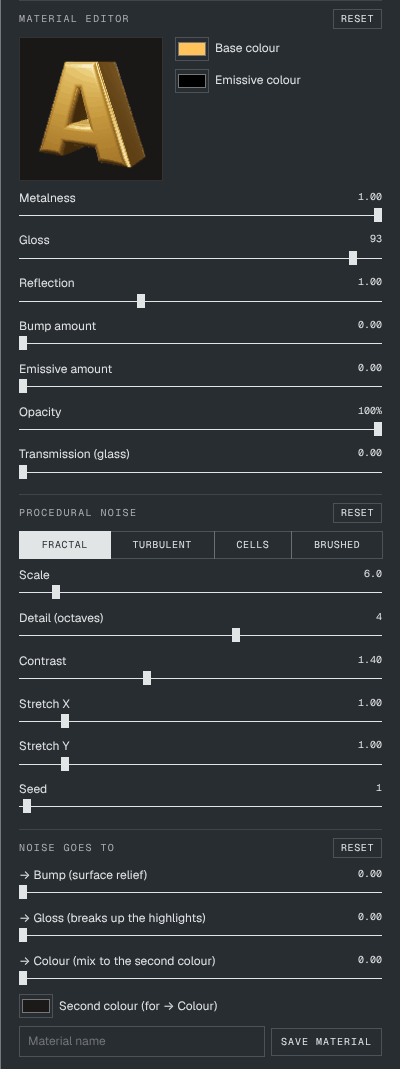
Shows the material you are editing.
The main colour of the material.
The colour of the light that the material gives off. It needs Emissive amount above 0.
Puts the material you are editing back to its library preset.
0 is not a metal (plastic, stone). 1 is a metal: it takes its look from the reflections.
0 to 1
How polished the surface is. High values give sharp highlights and reflections; low values give a matte surface.
0 to 100
How strongly the material reflects the environment.
0 to 3 · default 1
The strength of the surface relief of the material.
0 to 1
How much light the material gives off, in the Emissive colour. Use it for neon and hot metal.
0 to 6
How solid the material is. Under 100 % you see through it.
0 to 100 %
How much light passes through the material, like glass.
0 to 1
A pattern made by the app that you can send to the relief, the gloss or the colour of the material: Fractal, Turbulent, Cells or Brushed.
The size of the pattern. A higher value gives a finer pattern.
0.5 to 60 · default 6
How many layers of small detail the pattern has.
1 to 6 · default 4
The difference between the light and the dark parts of the pattern.
0 to 4 · default 1.4
Stretch the pattern in one direction. Use it for brushed metal or wood grain.
0.05 to 8 · default 1
Another version of the same pattern.
0 to 99
How much the noise changes the relief of the surface.
0 to 2 · default 0
How much the noise changes the gloss, so the highlights are not uniform.
0 to 1 · default 0
How much the noise mixes the Base colour with the Second colour.
0 to 1 · default 0
The colour that the noise mixes in.
Type a name and press Save material. The material goes to Your materials.
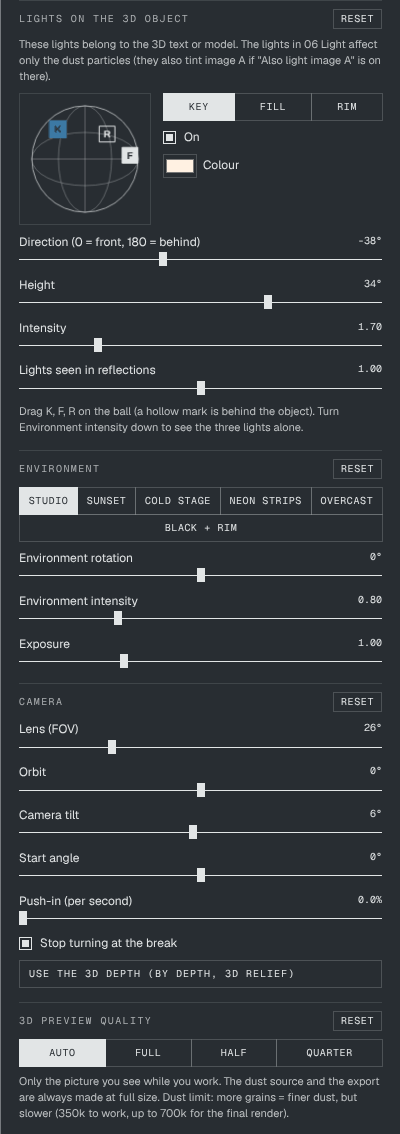
These lights belong to the 3D text or model. They are not the lights of 06 Light, which light the dust.
You see this box only in a project made with an older version, which had a single light. On: the object uses the three lights (Key, Fill, Rim). In a new project the three lights are always on.
Shows the direction of the three lights. Drag K, F or R on the ball. A hollow mark means the light is behind the object.
Chooses the light that the controls below change. Key is the main light, Fill softens the shadows, Rim lights the edge from behind.
Switches the chosen light on or off.
The colour of the chosen light.
Where the light is around the object. 0 is in front, 180 is behind.
−180° to 180°
How high the light is. Negative values light from below.
−89° to 89°
The strength of the chosen light.
0 to 8
How strongly the three lights show as highlights in a reflective material.
0 to 2 · default 1
The surroundings that the material reflects: Studio, Sunset, Cold stage, Neon strips, Overcast or Black + rim.
Turns the environment around the object, so the reflections move.
−180° to 180° · default 0
How bright the environment is.
0 to 3 · default 0.80
Tip Turn it down to see the three lights alone.
The brightness of the whole 3D render.
0.2 to 3 · default 1
The angle of the camera lens. A small angle is flat, like a long lens. A big angle gives strong perspective.
8° to 80° · default 26°
Moves the camera around the object.
−180° to 180° · default 0
Moves the camera up, so it looks down at the object (or the opposite with negative values).
−30° to 45° · default 6°
The angle of the object on the first frame. Useful with Turntable.
−180° to 180° · default 0
The camera moves slowly towards the object. The value is how much closer it gets each second.
0 to 20 % · default 0
On: the turntable stops at the Break frame, so the dust leaves from a still object.
Takes the real depth of the 3D render and uses it as the depth pass of Depth (Z). Then the dust can leave by depth and has 3D relief.
The size of the 3D picture while you work: Auto (half size while you drag a control or when playback is slow, full when idle), Full, Half or Quarter. It changes only what you see. The dust and the export are always made at full size.
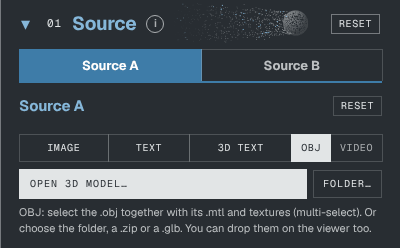
Opens a 3D model. For an OBJ, select the .obj together with its .mtl and its textures (multi-select). You can also open a .zip or a .glb, or drop the files on the viewer.
Opens a whole folder that has the model, the .mtl and the textures.
After loading, a short report under the buttons says what the app found in the files.
Off: the model uses the materials and textures of its file. On: the model uses a material of the library.
A 3D model uses the same blocks as a 3D text: Motion / Transform, Size, Turntable, Dust limit on 3D, Material, Lights on the 3D object, Environment, Camera, 3D preview quality and Animation. The app holds one model at a time.
Put something in Source B and the dust of A does not only fly away: it flies and lands as B. A photo can turn into another photo, into a word, into a 3D text. There is no switch: B is on when it has something in it.
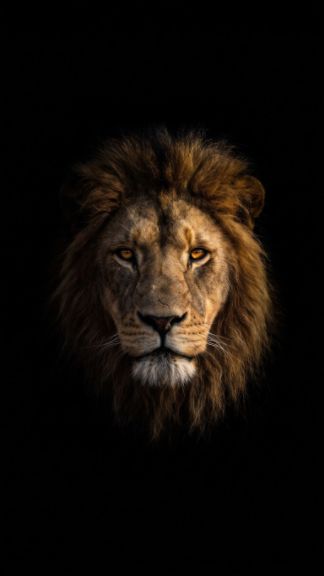 before the Break
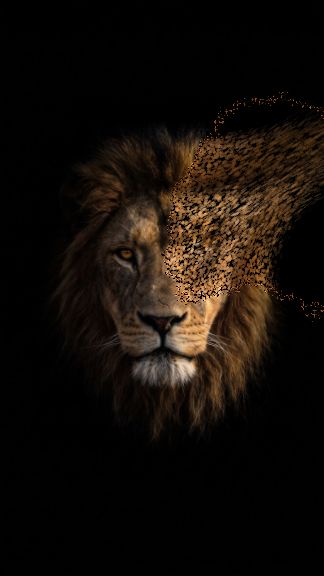 A breaks
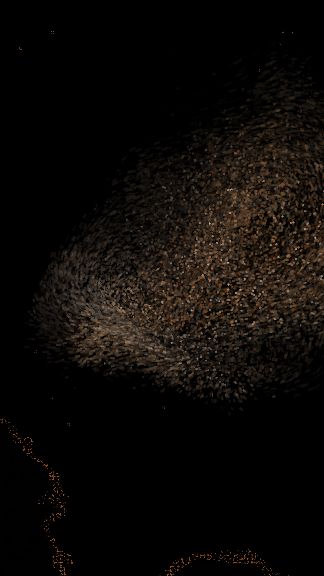 flight, B forms
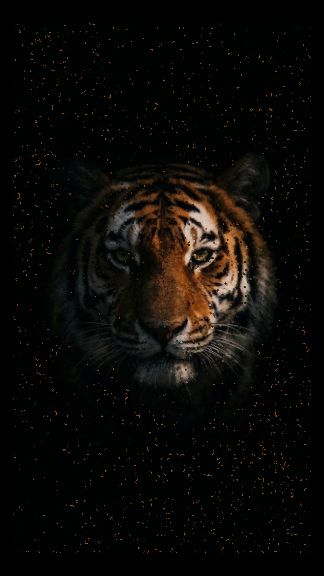 B formed
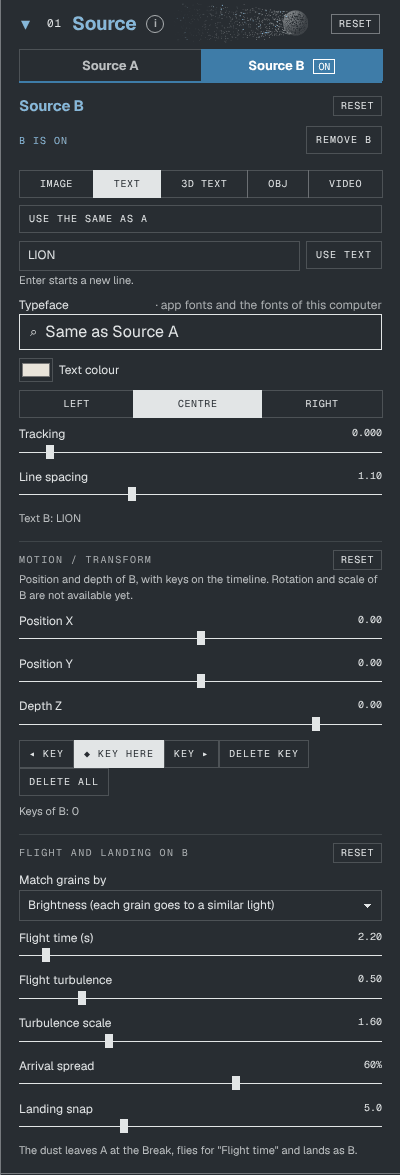
Opens the controls of Source B. The tab shows ON when B has something in it.
The kind of Source B.
B becomes the same picture as A. No file is opened again. The dust breaks away and then forms the same picture again. B follows A until you load something else as B.
Tip Use it to make a picture go to dust and come back.
Empties Source B. Then A breaks into dust and nothing forms again. Undo brings B back.
Opens a photo or a video as Source B.
When video B starts to play: At the break or At frame 1.
Type the text of B and press Use text. B has its own Typeface (or Same as Source A), Style, Text colour, alignment, Tracking and Line spacing All settings. They work like the ones of Text in Source A.
Type the text and press the button. B is a still 3D render. It uses the 3D look set in Source A → 3D Text (typeface, bevel, material, lights, camera). To change the look, change it there and press the button again.
B is a still render of the 3D model loaded in the app, with its materials and lights. The app holds one model at a time; it is shared with Source A → OBJ.
The position and the depth of B, with keys on the timeline. Rotation and scale of B are not available yet.
X −2.5 to 2.5 · Y −1.8 to 1.8 · Z −4 to 0.85
The key buttons of B. They work like the ones of Source A. How keys work.
The dust leaves A at the Break, flies for Flight time and lands as B. On the timeline, the layer shows a bar BREAK and, under it, a bar FORM B at the frames where B really forms.
How each grain of A chooses its place in B. Brightness: each grain goes to a place with a similar light. Colour: to a similar colour. Position: a short flight, almost a cross-fade. Random: the most mixing. Columns: a horizontal sweep.
How long each grain flies from A to B.
0.3 to 30 s · default 2.2
Tip A long flight gives a cloud that travels. A short flight is close to a cross-fade.
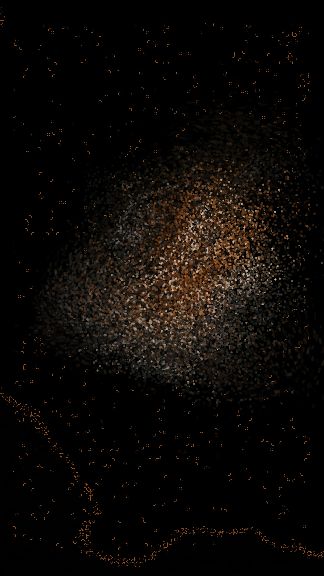 Flight time 1 s
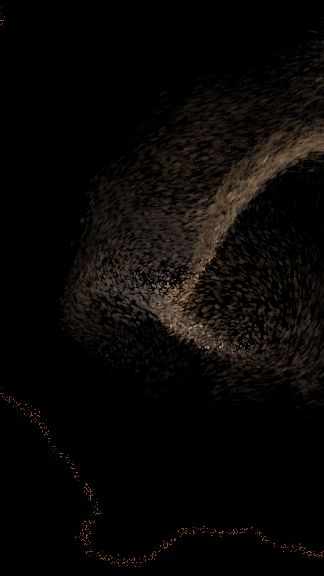 Flight time 5 s
Swirls in the air during the flight. With 0 the grains fly straight. It fades before the landing, so the grains still land in their place.
0 to 3 · default 0.5
The size of the swirls of the flight.
0.2 to 6 · default 1.6
How different the flight times of the grains are. With 0 % they all arrive together. With more, some arrive early and some late.
0 to 100 % · default 60 %
How strongly a grain is pulled to its place in B at the end of the flight. High values land fast and hard; low values land softly.
1 to 15 · default 5
Ready-made looks. Click one to apply it to the selected layer. A preset is a look: it does not change your source, the timing of the layer or the parts of the effect.
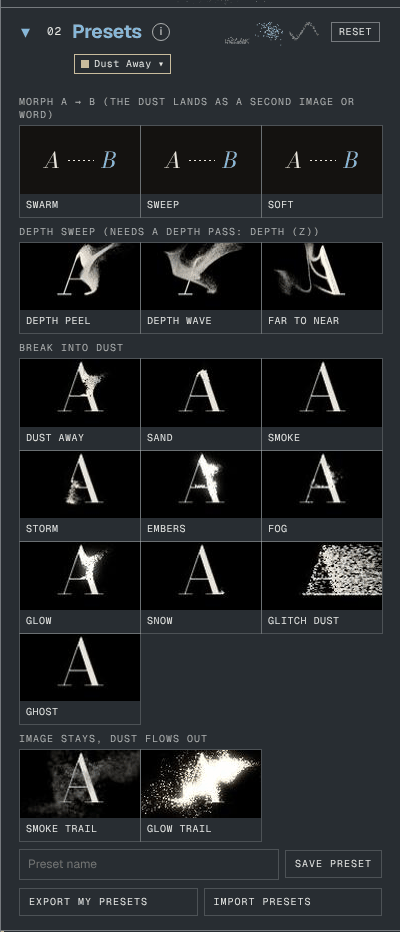
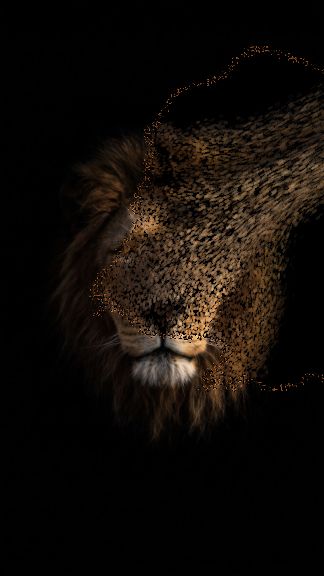 Dust Away
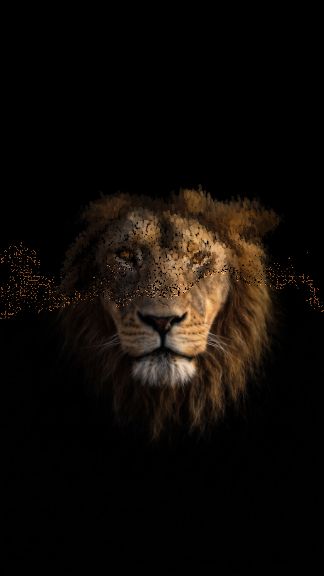 Sand
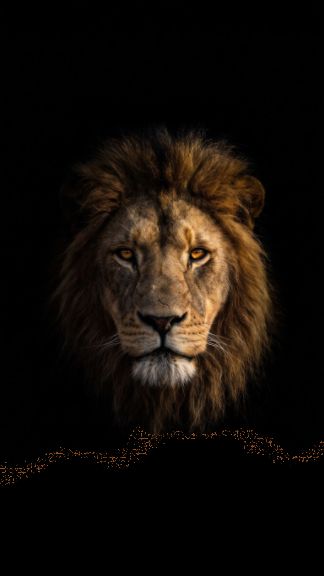 Smoke
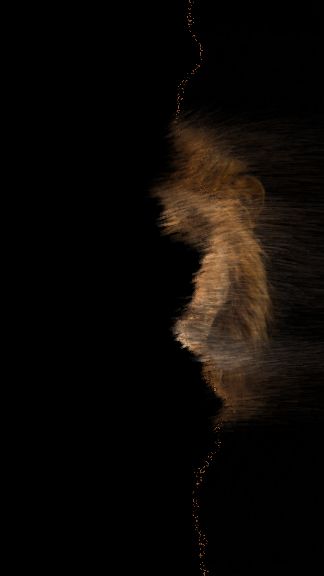 Storm
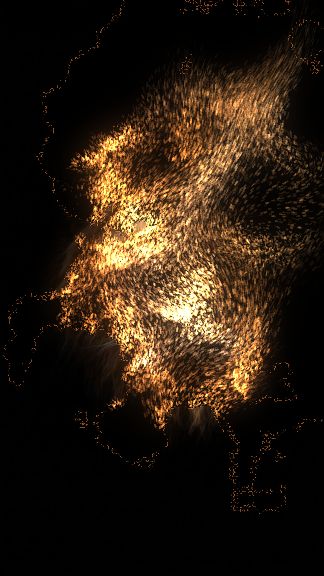 Embers
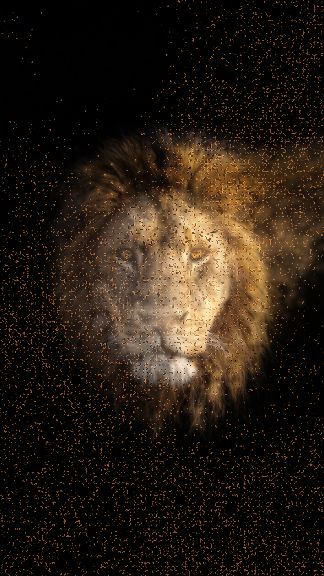 Fog
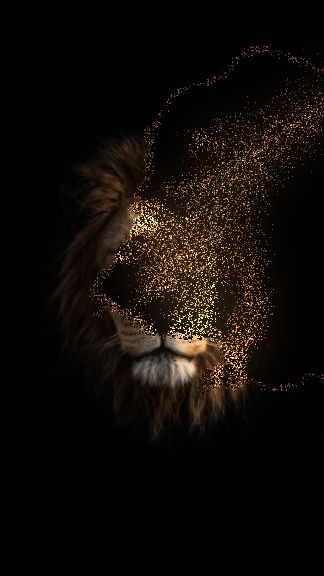 Glow
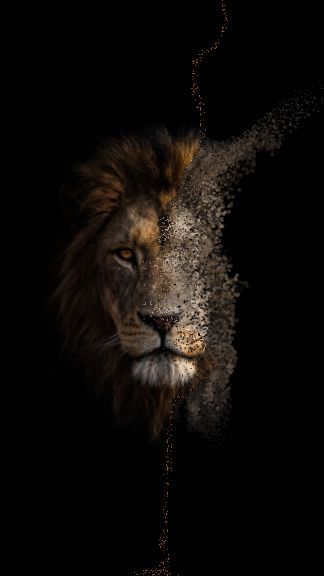 Snow
The looks that break the picture: Dust Away, Sand, Smoke, Storm, Embers, Fog, Glow, Snow, Glitch Dust and Ghost.
Looks where the image stays and dust flows out of it (Emit).
Looks for the flight to Source B. Swarm: grains fly to a place with the same brightness in B. Sweep: B is drawn column by column. Soft: a short flight, close to a cross-fade.
Looks that need a depth pass (Depth (Z)). Depth Peel: the picture peels away by depth, from the nearest part to the farthest. Depth Wave: a soft band of dust travels through the depth of the picture. Far to Near: the background leaves first, the nearest part last.
Type a name and press Save preset to keep the look of the selected layer as your own preset. Your presets have a dashed border.
Save your presets as a file (.json), or load presets from a file. Use it to move your presets to another computer.
Right-click a preset for more: Apply, Apply to all layers, Rename, Delete and Export this preset (your own presets).
How the dust leaves the image. There are two modes. Break: the image breaks away. Emit: the image stays and dust flows out of it.
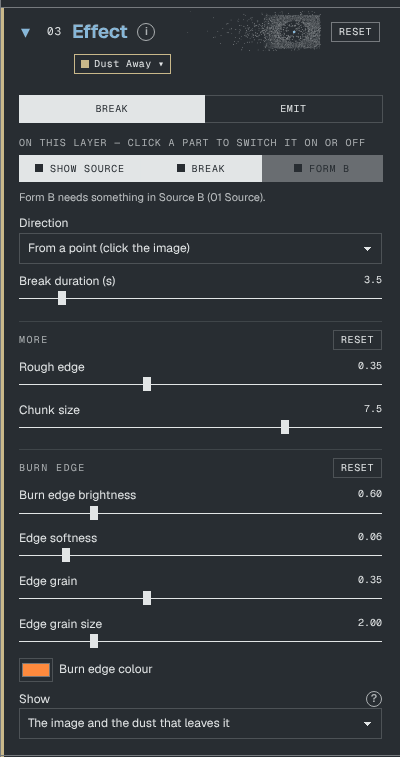
The mode of the selected layer. One project can have Break layers and Emit layers together.
 Break
 Emit
Three buttons. Click a part to switch it on or off for the selected layer. A small note under them explains the combination you chose.
On: you see the solid picture of A before it breaks. Off: only the particles (good for compositing). The picture is one for all layers: it hides when every layer has Show source off.
On: A turns to dust. Off: A does not break. With Form B on and Break off, the dust appears from the dust origin and forms B.
On: the dust forms B. It works only when Source B has something in it. Off: the dust only breaks away.
The order in which the picture breaks. From a point: from the dust origin (click the image). Left to right, Right to left, Top to bottom, Bottom to top. Random: everywhere at the same time. By depth: near to far (Z) and far to near (Z): need a depth pass. Bright areas, once All settings: the bright areas send out dust one time and the image is not cut.
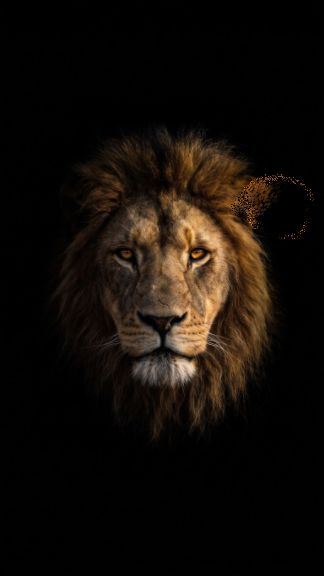
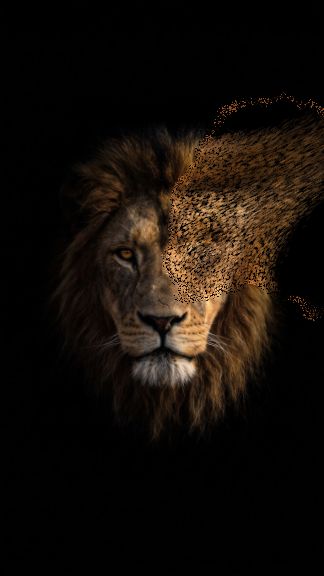 From a point
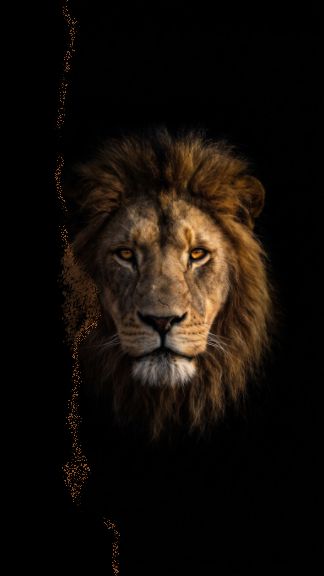 Left to right
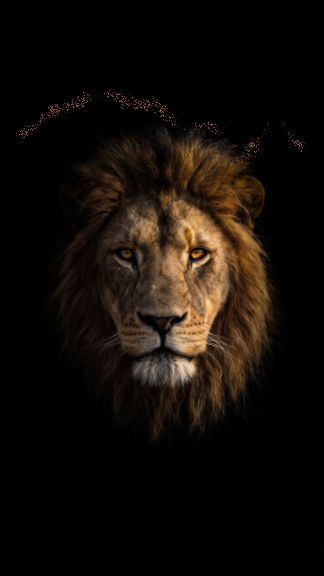 Top to bottom
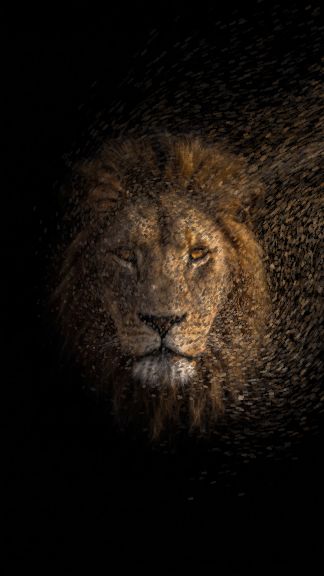
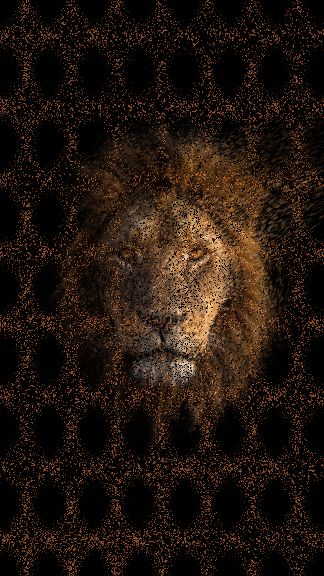 Random
How long the picture takes to break, from the first grain to the last. The dust goes on flying after that.
0.2 to 30 s · default 3.5
Tip You can also drag the right end of the layer bar on the timeline.
 1 s
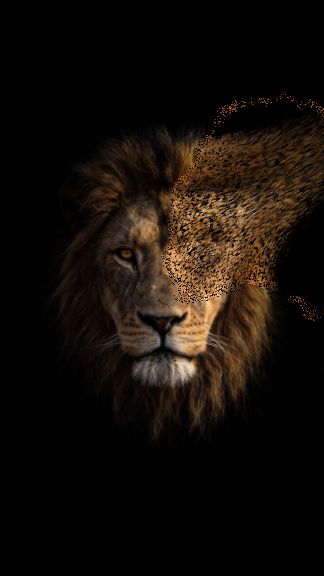 3.5 s
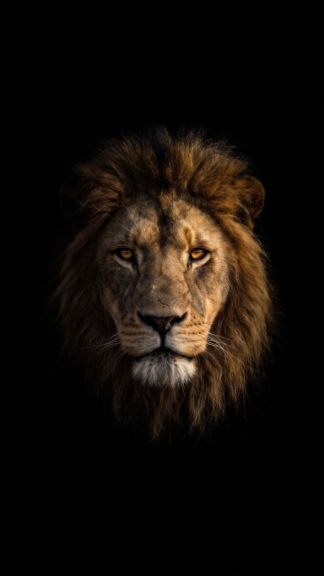 9 s
How irregular the line of the break is. With 0 the break advances as a clean line.
0 to 1 · default 0.35
The size of the pieces that the rough edge is made of. Bigger values give bigger chunks.
0.5 to 10 · default 7.5
How slowly the dust starts to leave. Higher values: few grains at first, most of them later.
0.5 to 5 · default 2.5
How bright an area must be to send out dust.
0 to 0.8 · default 0.25
The share of the grains that leave the image.
0.1 to 100 % · default 100 %
The line where the picture is breaking can glow, like paper that burns.
How bright the edge of the break is. With 0 there is no burn edge.
0 to 3 · default 0.60
How soft the border between the picture and the hole is.
0 to 0.5 · default 0.06
How much grain the edge has.
0 to 1 · default 0.35
The size of that grain.
0.5 to 8 · default 2
The colour of the burn edge. The default is orange.
Image A stays whole and sends out new grains all the time. Each grain lives for its Life, then it is born again from A in another place. The same frame always renders the same.
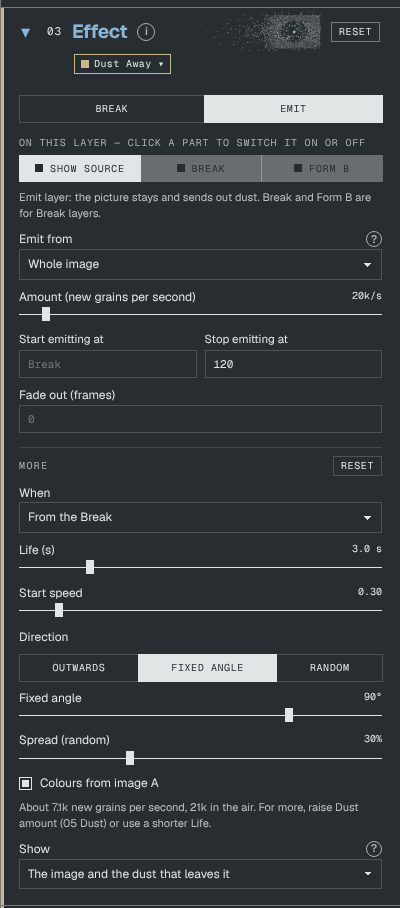
Where the grains are born: Whole image, Bright areas, Edges or Mask image.
Whole image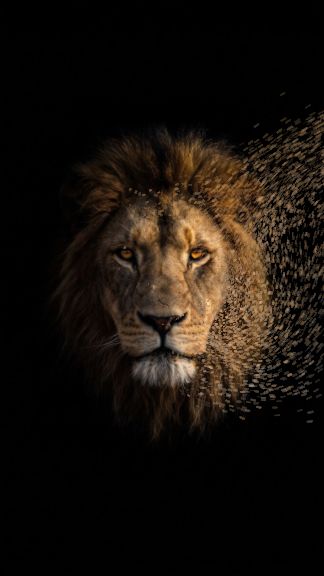 Bright areas
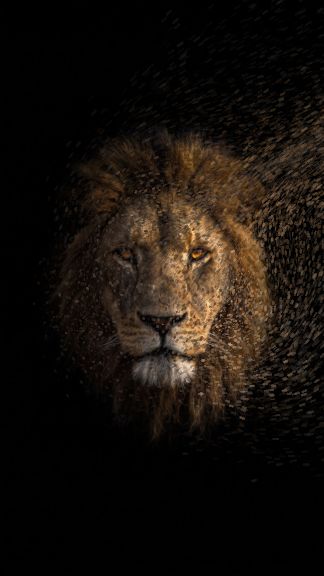 Edges
Opens a black and white image. The white parts send out dust. It appears when Emit from is Mask image. The mask is not saved in the project: load it again after you open the project.
How many new grains are born each second. The note under the controls tells how many grains are in the air.
500 to 300k per second · default 20k
Tip For more grains in the air, raise Dust amount in 05 Dust or use a shorter Life.
The frame where this layer starts to emit. Empty: at the Break (or at frame 1 with The whole clip).
The frame where this layer stops making new grains. Grains already in the air live until their life ends. Empty: it never stops.
Over how many frames before the stop the emission goes down to zero, little by little. It appears when there is a Stop frame.
0 to 900 frames
From the Break: the emission starts at the Break marker. The whole clip: it starts at frame 1.
How long each grain lives before it is born again.
0.2 to 15 s · default 3
How fast a grain leaves the image when it is born.
0 to 3 · default 0.30
How bright a part of the image must be to send out dust.
0 to 100 % · default 50 %
Where the new grains go: Outwards (away from the image), Fixed angle or Random.
The angle of the emission.
−180° to 180° · default 90°
How much each grain differs from the main direction.
0 to 100 % · default 30 %
On: each grain takes the colour of the place where it is born. Off: the grains do not take the colours of the picture.
What you see of the image. The image and the dust that leaves it (normal). Only the dust that leaves (no image). The image made of grains: the picture is built from the grains.
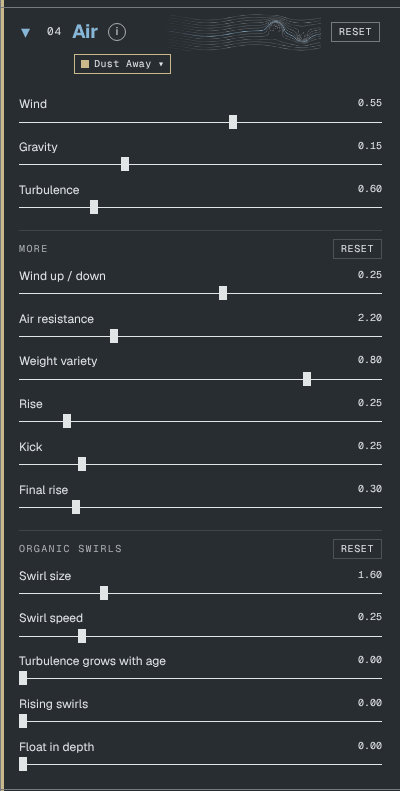
Forces that move the dust once it has left the image: wind, gravity and turbulence.
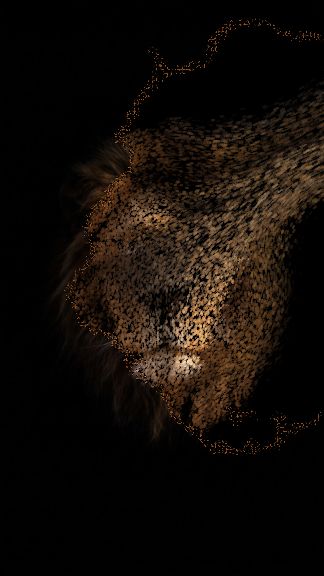 Default
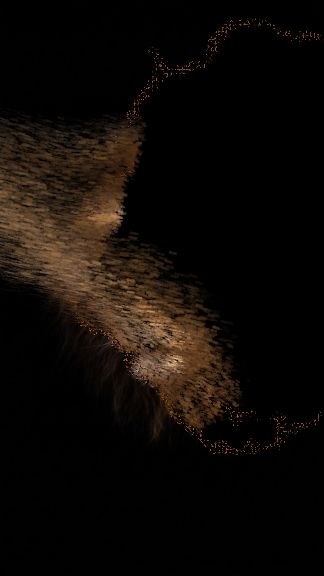 Wind −1.6
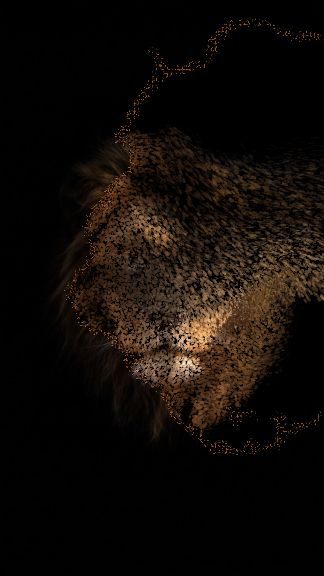 Gravity 1.6
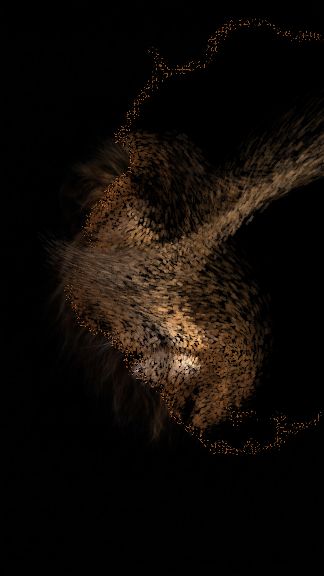 Turbulence 2.4
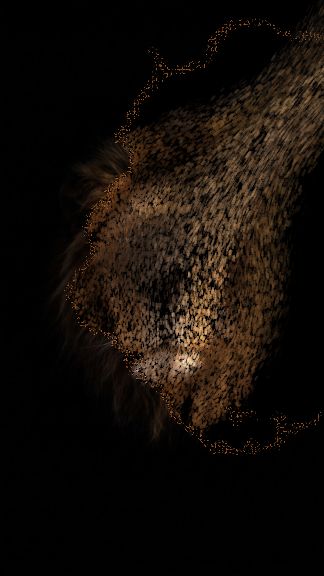 Rise 1.6
Side wind. Positive values push the dust to the right, negative values to the left.
−3 to 3 · default 0.55
Pulls the dust down. Negative values make it go up.
−1 to 3 · default 0.15
Swirls in the air. With 0 the dust flies in clean lines; high values give a chaotic cloud.
0 to 3 · default 0.60
Vertical wind. Positive values push the dust up.
−2 to 2 · default 0.25
How fast a grain takes the speed of the air around it. High: the dust follows the wind closely and stops soon. Low: the grains keep their own speed for longer.
0.2 to 8 · default 2.2
How different the weight of the grains is. With more variety, light grains react fast to the air and heavy grains react slowly, so the cloud spreads out.
0 to 1 · default 0.80
A force that lifts the dust, like smoke. Light grains rise more.
0 to 2 · default 0.25
A small push in a random direction at the moment a grain leaves the image.
0 to 1.5 · default 0.25
When the image moves (it has keys in Motion / Transform), how much of its speed a grain keeps when it leaves. It appears when the source has keys.
0 to 3 · default 1
The moving image drags the air near it, and the dust in that air. It appears when the source has keys.
0 to 4 · default 0.60
A second lifting force that comes in later in the clip. It starts at Final rise starts at and grows over about 3 seconds.
0 to 2 · default 0
The same late force, but towards the camera. It appears when Final rise is above 0.
0 to 3 · default 0
The time of the clip, in seconds, when Final rise begins.
0 to 60 s · default 0
The size of the swirls of the turbulence. Small values give big, slow shapes; big values give small, busy swirls.
0.3 to 6 · default 1.6
How fast the swirls change in time.
0 to 1.5 · default 0.25
The older a grain is, the more the turbulence moves it. The dust starts calm and gets wilder.
0 to 2 · default 0
Adds swirls that turn and lift the dust, like hot air.
0 to 3 · default 0
The dust also drifts towards you and away from you.
0 to 2 · default 0
How each grain looks: amount, size, colour and how it fades. Each grain gets a random size between Min size and Max size.
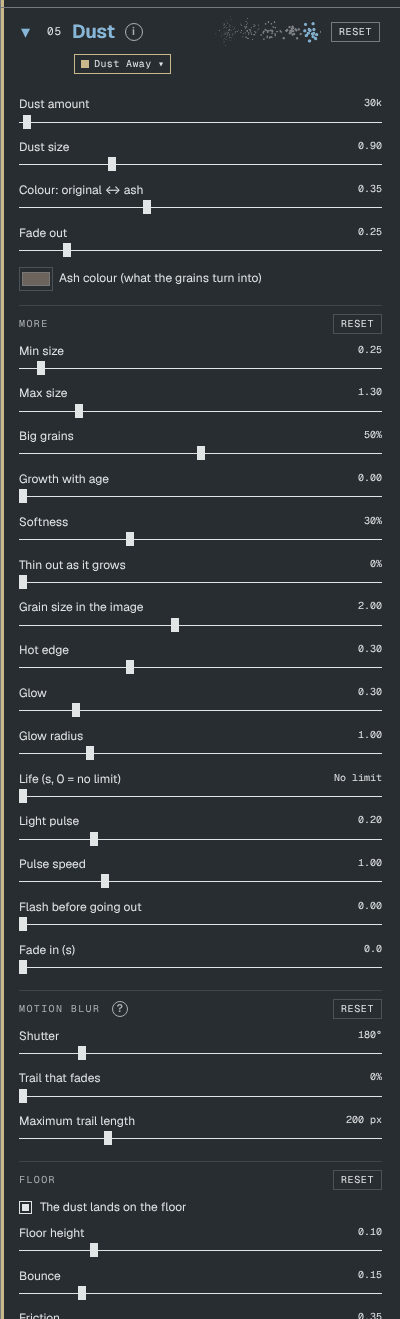
How many grains the picture is made of. More grains give finer dust, but the app is slower.
20k to 1000k
Tip If the app is slow, lower this first. Raise it again for the final export.
The size of the grains in the air.
0.2 to 3 · default 0.90
 Dust size 0.4
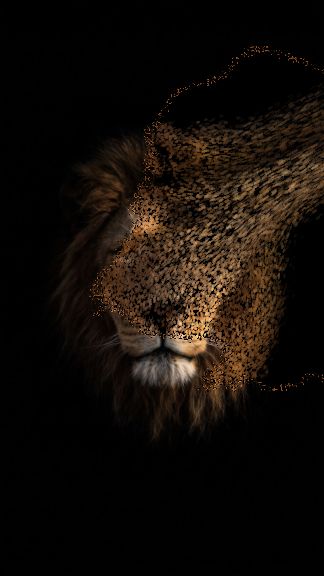 0.9
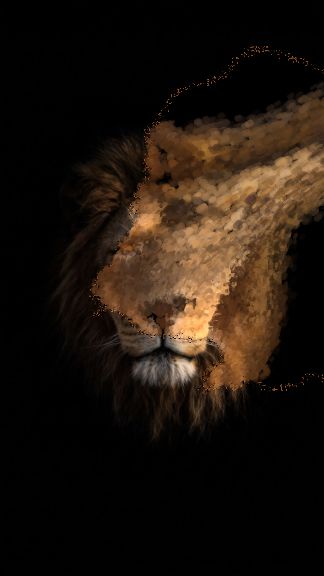 2.4
At 0 the grains keep the colour of the picture. At 1 they turn into the Ash colour.
0 to 1 · default 0.35
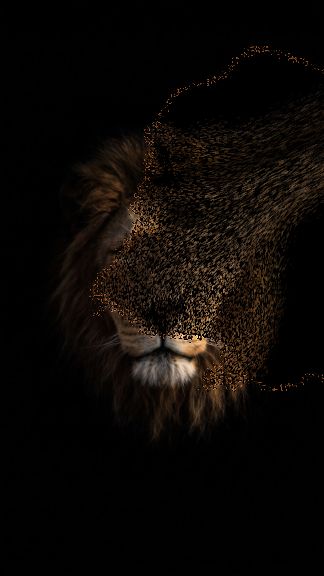
 0: original colour
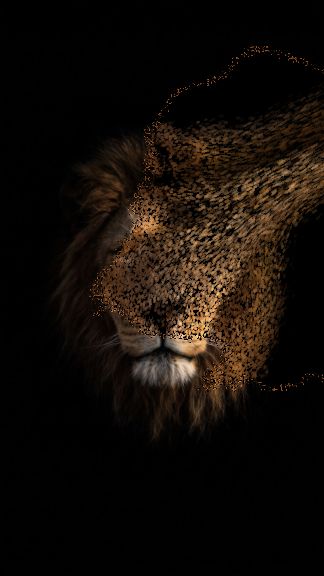
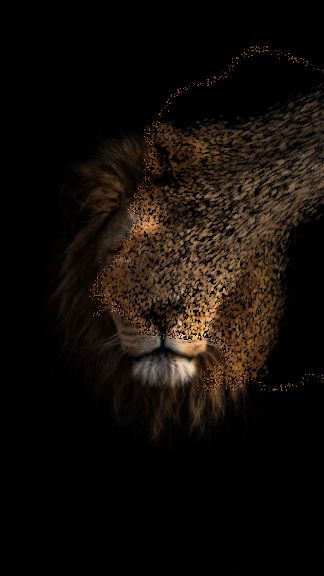 1: ash
How fast the grains fade after they leave the image. With 0 they do not fade.
0 to 2 · default 0.25
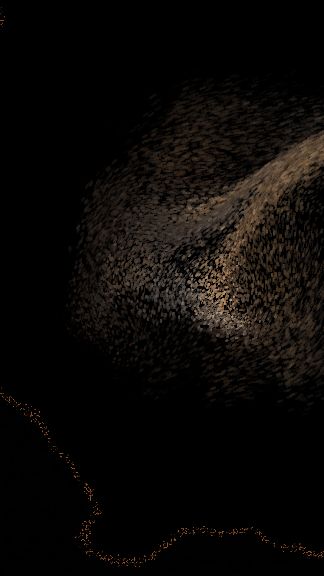 Fade out 0
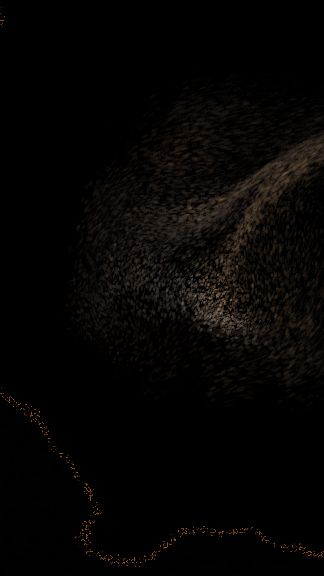 Fade out 1.2
The colour that the grains turn into.
The smallest and the biggest grain. Each grain gets a random size between the two.
Min 0.05 to 4 (default 0.25) · Max 0.05 to 8 (default 1.30)
The share of big grains in the mix.
0 to 100 % · default 50 %
The grains get bigger while they fly. Good for smoke and fog.
0 to 5 · default 0
How soft the edge of each grain is. 0 % is a hard dot, 100 % is a soft puff.
0 to 100 % · default 30 %
A grain gets more transparent while it grows. Use it with Growth with age.
0 to 100 % · default 0 %
The base size of every grain. A grain that is still part of the picture has this size. In the air its size is this × Dust size × Min / Max size.
0.5 to 4 · default 2
A short orange glow on each grain at the moment it leaves the image, like an ember.
0 to 1 · default 0.30
A soft halo of light around the dust.
0 to 2 · default 0
How wide the glow is. It appears when Glow is above 0.
0.3 to 4 · default 1
How long a grain lives after it leaves the image. With 0 it has no limit (it fades with Fade out). In Emit mode the life is set in 03 Effect.
0 to 15 s · default: no limit
The grains get brighter and darker in a rhythm, each one at its own moment.
0 to 1 · default 0
How fast the pulse is. It appears when Light pulse is above 0.
0.1 to 4 · default 1
A grain gets brighter for a moment near the end of its life. It needs a Life.
0 to 2 · default 0
The dust starts faint and reaches its full strength after this time, counted from the start of the clip.
0 to 30 s · default 0
Stretches each grain in the direction it moves, like a camera shutter. 180° is the film standard; more degrees give longer trails. 0 switches it off.
Off to 1080° · default 180°
The end of the trail fades out.
0 to 100 % · default 0 %
The longest trail, in pixels of a 1080p frame.
10 to 800 px · default 200 px
On: the grains stop on a floor and do not fall out of the frame.
The height of the floor, from the bottom of the frame.
0 to 0.5 · default 0.10
How much a grain jumps when it hits the floor.
0 to 0.9 · default 0.15
How fast a grain stops when it slides on the floor.
0 to 1 · default 0.35
Up to 3 lights that colour and brighten the dust near them. These lights affect only the dust (and image A, if Also light image A is on). A 3D text or model has its own lights in 01 Source.
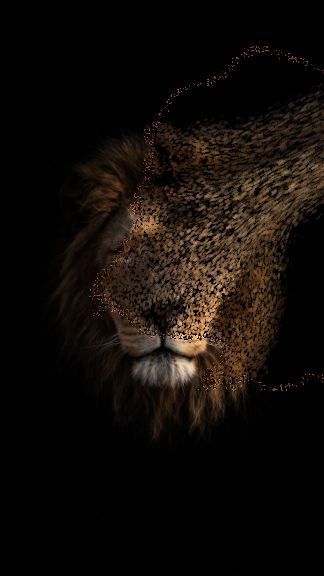 Light off
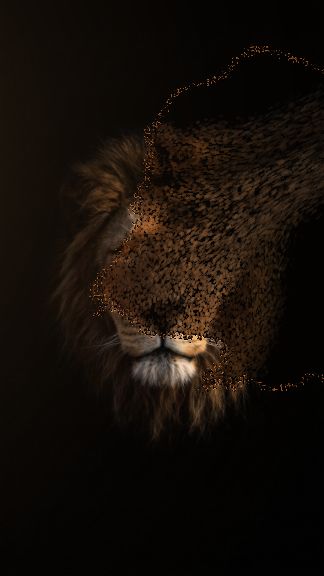 Light on
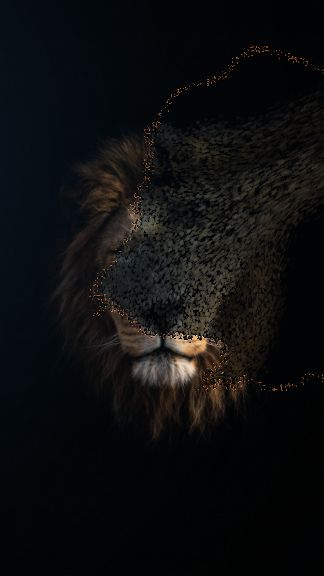 Blue light
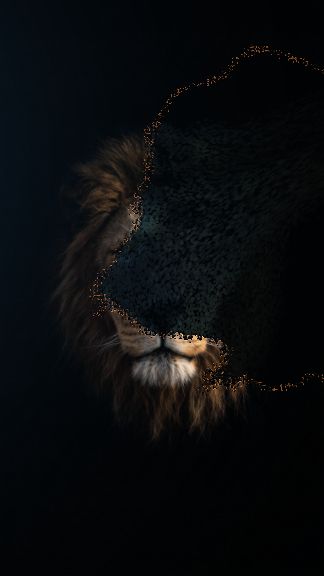 Ambient 5 %
Switches the lights on. A small mark on the title of the section shows that the light is on, with its colour.
The colour of the light. Grains near the light take this colour and get brighter.
Each light has a mark with its number (1, 2, 3) on the picture. Drag a mark to move its light.
Tip Put the pointer on the picture and press L: light 1 goes there. Or right-click the picture and choose Put light 1 here.
Chooses the light that the controls below change.
Switches the chosen light on or off.
The place of the chosen light in the frame.
X −3 to 3 · Y −2 to 2
The light in front of the picture (+) or behind it (−).
−2 to 2 · default 0.35
The strength of the chosen light.
0 to 5 · default 1.80
How far the light reaches.
0.1 to 5 · default 1.70
Keys of the chosen light, to make it move in time. Moving the light never makes a key by itself. How keys work.
The brightness of the dust that is far from the lights. Low values make that dust dark, so the light stands out.
0 to 150 % · default 35 %
Extra light and size for the grains very close to a light.
0 to 2 · default 0.60
A soft glow in the picture at the place of each light.
0 to 2 · default 0.60
Lights from behind the grains that are in front of a light, so their edge shines.
0 to 2 · default 0
On: the lights also tint the picture of A, not only the dust.
On: the lights affect the selected layer. Off: this layer ignores them. It appears when there is more than one layer.
Format, resolution and background of the file you export. The format buttons are also in the export bar under the panel.
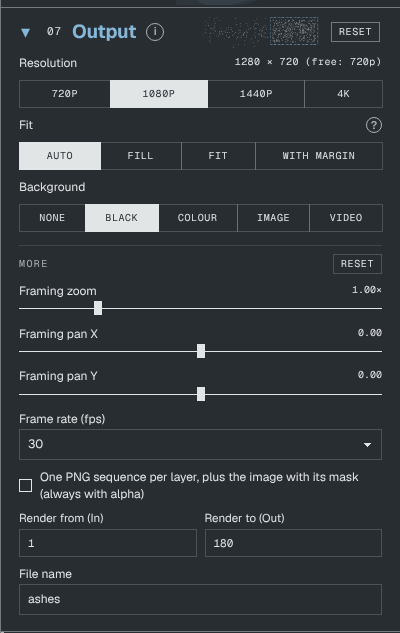
The size of the export: 720p, 1080p, 1440p or 4K. The number is the short side of the frame, so 1080p in 9:16 is 1080 × 1920. The exact size in pixels is next to the title. In FREE the MP4 is 720p at most.
How the source sits in the frame. Fill: the source covers the frame (it can cut the sides). Fit: the whole source is visible. With margin: room around the source for the dust. Auto: Fill for photo and video, Fit for 3D, With margin for text.
What is behind the source: None (transparent), Black, Colour, Image or Video. With None, the PNG sequence keeps the alpha and the MP4 uses black.
The colour of the background. It appears with Colour.
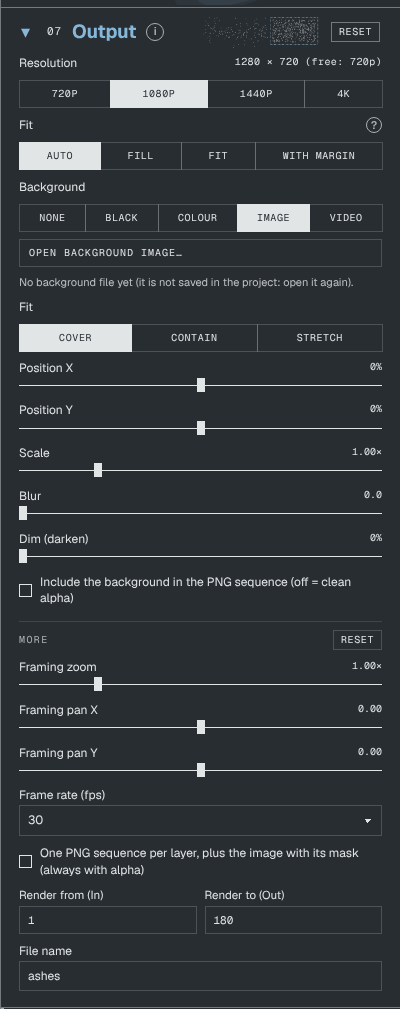
Opens the file of the background. It appears with Image or Video.
Cover: the background fills the frame. Contain: the whole background is visible. Stretch: it is stretched to the frame.
Move and resize the background.
Position −100 to 100 % · Scale 0.2× to 4×
Blurs the background, so the source stands out.
0 to 60 · default 0
Makes the background darker.
0 to 100 % · default 0 %
For a video background: Loop or Hold last frame.
Off: the PNG files have a clean alpha, without the background. On: the background is in the PNG files.
How big the whole picture (source and dust together) sits in the output frame. It is the camera framing, not an animation: to move or animate the source use Position in 01 Source.
0.2× to 4× · default 1×
Move the whole picture (source and dust) sideways, or up and down, in the output frame. Not animated.
−1 to 1 · default 0
The exact size of the frame. They appear when the format is Custom.
16 to 8192 px
Draws on the viewer the areas that the apps cover with the profile, the caption and the buttons. Keep the important part out of them. It appears with the formats 9:16 and 4:5. It is never exported.
The frames per second of the timeline and of the export: 24, 25, 30, 50 or 60.
Default 30
For compositing: the PNG export writes one folder for each layer, always with alpha, and the image with its mask.
The first and the last frame of the export. They are the same as the In and Out markers of the timeline; here you can type the exact frame.
The name of the exported files.
Default: ashes
On: the MP4 has the sound of video A. It appears when Source A is a video.
Each layer has its own dust and its own physics, made from the same Source A. The top layer is drawn on top. This section changes the selected layer. The list of layers is at the bottom left: see Layers.
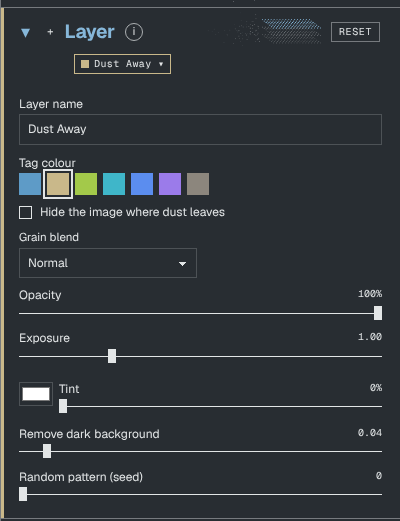
The name of the layer in the list. Double-click a layer row to edit it here.
Up to 32 characters
The colour that marks the layer in the list, on its bar of the timeline and in the panel: Steel, Sand, Lime, Cyan, Blue, Violet or Grey.
On: the picture gets a hole where the grains of this layer have left. Off: the picture stays whole under the dust of this layer.
How the grains of this layer mix with each other: Normal, Additive (adds light: glow, embers), Screen or Lighten. The blend of the whole layer is on its row in the timeline.
How visible the dust of this layer is.
0 to 100 % · default 100 %
The brightness of the dust of this layer.
0 to 4 · default 1
A colour that is mixed into the dust of this layer. The colour box chooses the colour; the slider sets how much.
0 to 100 % · default 0 %
The dark parts of the picture make no grains. Use it for a subject on a black background, so the black does not turn to dust.
0 to 0.6 · default 0.04
Another roll of the dice for this layer: which grains leave first, where each grain sits and how it flies. Same look, different pattern. Useful when two layers must not move alike.
0 to 99 · default 0
A depth pass is a grey picture of image A where each grey says how near that part is. With it, grains leave from their real depth, the break can travel through the depth of the picture, and nearer parts hide the dust behind them.
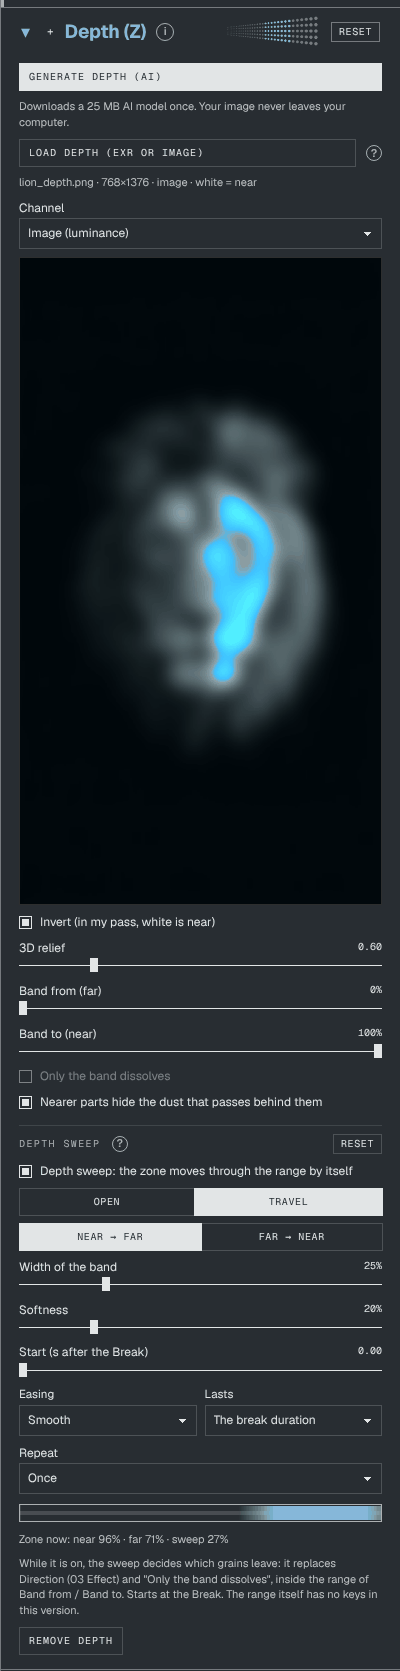
Makes a depth pass of image A with an AI model. The first time, the app downloads the model (about 25 MB); then the browser keeps it. The model runs on your computer: your image is never uploaded. This step needs the internet the first time.
For a video, the app makes one depth map for each frame. This control smooths the depth from frame to frame, so it does not flicker.
0 to 90 % · default 50 %
Opens your own depth pass. Images: PNG or JPG, white = near (16-bit files are read as 8-bit). EXR: scanline, no compression, RLE, ZIPS, ZIP, PIZ or PXR24, half or float (not B44 or DWA). The pass must have the same framing as image A.
The channel of the file that holds the depth. An EXR can have several channels.
A small picture of the depth pass: light is near. The band that dissolves is tinted blue.
Tells the app which grey is near in your pass. If near and far look swapped in the preview (light must be near), change this box.
How much real depth the picture has. With 0 the picture is flat. With more, near parts sit nearer to the camera and their grains start from there.
0 to 3 · default 0.60
The range of depth that the effect uses. 0 % is the farthest part, 100 % the nearest.
0 to 100 % · default 0 % and 100 %
On: only the parts inside the band turn to dust. The rest of the picture stays.
On: a grain that flies behind a nearer part of the picture is hidden by it. This gives real depth to the shot.
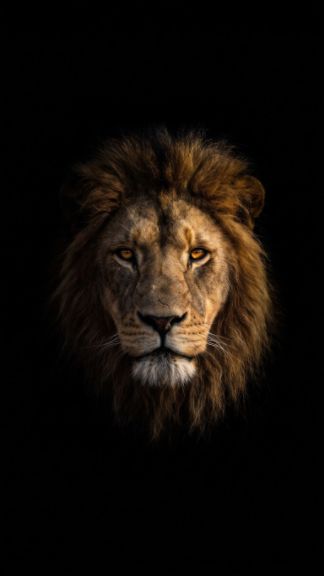 frame 41
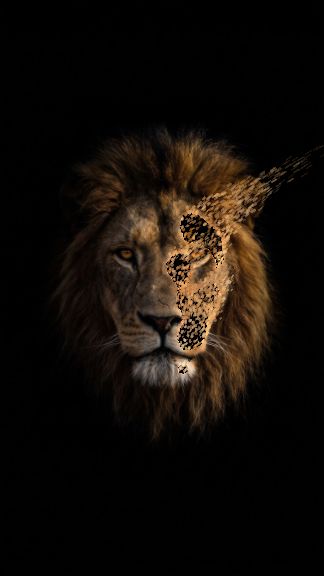 frame 61
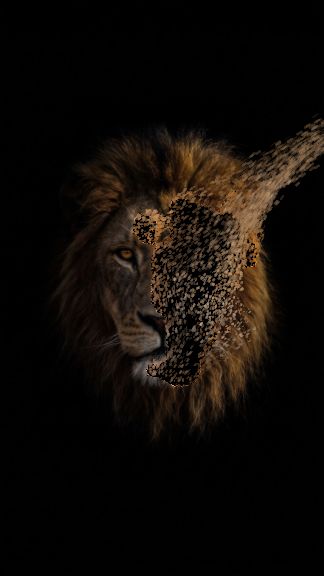 frame 86
The active zone (blue in the preview) moves by itself through the range set with Band from and Band to, so the grains leave by depth, little by little. No keys needed. While it is on, the sweep decides which grains leave: it replaces Direction (03 Effect) and Only the band dissolves. It starts at the Break.
Switches the sweep on.
Open: the zone grows from the starting edge until it covers the whole range. Travel: a band slides across the range.
The direction of the sweep. Far → Near starts at the far edge.
How wide the travelling band is.
2 to 100 % · default 25 %
How soft the border of the zone is. With 0 % the zone has a hard border.
0 to 100 % · default 20 %
How long the sweep waits after the Break.
0 to 10 s · default 0
The rhythm of the sweep: Linear, Smooth, Ease-in or Ease-out.
How long the sweep takes: The break duration, Whole effect or Custom… (then a slider Duration (s) appears, 0.1 to 30 s).
Once: the zone moves one time. Loop and Ping-pong: it moves again and again. On a Break layer a grain that has left does not come back, so you see the repeat on Emit layers.
A bar under the controls: far on the left, near on the right. The outline is your range; the blue part is the zone on this frame. The line under it gives the same in numbers.
Unloads the depth pass.
A blow is wind that you paint with the mouse. Play the clip and drag on the image: the dust is pushed where you drag. The blow stays on the timeline and goes into the export.
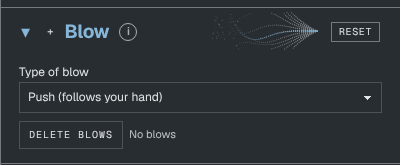
Press Space to play, then drag on the picture. The frames with a blow are marked on the Keys row of the timeline.
Push (follows your hand), Swirl, Burst (pushes away), Suck (pulls in), Turbulence, Gust or Custom. The settings change everything you recorded, also afterwards.
How strong the blow is.
0 to 5 · default 1
How big the area of the blow is.
0.03 to 1.2 · default 0.28
How much the blow pushes the dust the way you dragged.
0 to 4 · default 1
Positive values push the dust away from the pointer; negative values pull it in.
−4 to 4 · default 0.40
Turns the dust around the pointer. The sign sets the direction.
−4 to 4 · default 0
Adds disorder to the blow.
0 to 4 · default 0
How soft the border of the brush is.
0 to 100 % · default 100 %
On: the blow also makes the grains under the brush leave the image.
Deletes all the recorded blows.
The bottom of the window. At the left, the transport and the list of layers. At the right, the timeline: time goes from left to right, and each layer has its own bar.
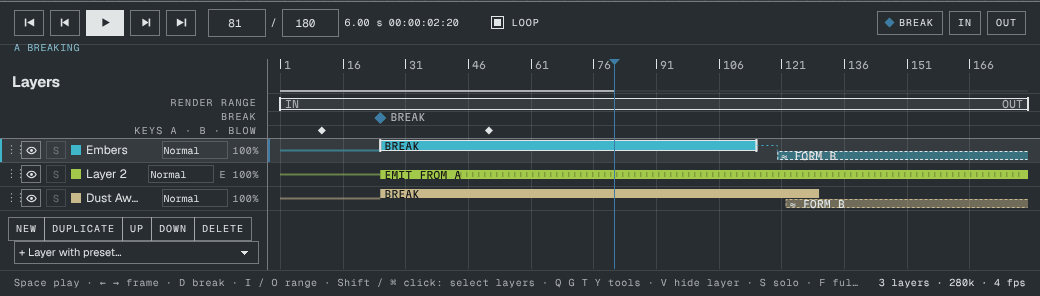
Plays the clip in the viewer.
Shortcut: Space
The four buttons around Play.
Shortcuts: Home · ← · → · End. With Shift, the arrows move 10 frames.
The frame under the playhead. Type a number and press Enter to go to that frame.
The length of the whole clip. Type a number and press Enter. Next to it you see the length in seconds and the time of the playhead.
2 to 9000 frames · default 180 (6 s at 30 fps)
On: when the clip reaches the end, it plays again from the start.
Puts the Break marker on the current frame. The Break is the frame where the picture starts to turn to dust.
Shortcut: D
Set the start and the end of the render range on the current frame. Only the frames from In to Out are exported.
Shortcuts: I · O
The line under the transport says what happens on this frame for the selected layer, for example A breaking, A breaking · B forming 40 % or B formed.
At the bottom right: the number of layers, the number of grains and the speed of the preview in frames per second.
A layer is one cloud of dust with its own look, physics and timing. All the layers are made from the same Source A. Use several layers to mix looks, for example fine dust plus a few bright embers. The top layer in the list is drawn on top.
Click a row to select the layer: the panel then shows its settings. Double-click the row to edit its name. Drag a row up or down to change the order.
Shift + click selects a range · Ctrl / ⌘ + click adds or removes one layer
Shows or hides the layer in the viewer and in the export.
Shortcut: V
Shows only this layer. Click again to show all the layers.
Shortcut: S
The small square of colour. Click it to go to the next colour.
The list on the row. How the dust of this layer mixes with what is under it: Normal, Add, Screen, Overlay, Soft light, Lighten, Darken, Multiply or Difference. A ! next to it is a warning: read it with the pointer on the mark.
Tip Blend modes are best on layers that only show particles. The picture of A is drawn once for all the layers, in Normal.
The number at the right of the row is the opacity of the layer. An E before it marks an Emit layer. Change the opacity in + Layer.
Adds a new layer.
Makes a copy of the selected layers.
Shortcut: Ctrl / ⌘ + D
Move the selected layers up or down in the list.
Deletes the selected layers. With several layers, the app asks first.
Adds a new layer that starts with the preset you choose in the list.
With several layers selected, the Break / Emit buttons, the parts of the effect and the blend change all of them, and dragging one bar moves all of them in time.
The numbers at the top are frames. Click or drag on the timeline to move the playhead.
The bar under the ruler. Drag its two ends to set the first and the last frame of the export.
The filled diamond with the label BREAK. Drag it to change the frame where the dust starts.
The bar of a Break layer is its break: it starts at the Break and lasts for the Break duration. Drag the bar to make this layer start earlier or later than the others. Drag its right end to change the Break duration. Drag its left end to move the start and keep the end.
Tip The ends snap to the playhead and to the starts and ends of the other layers. Hold Shift to switch the snap off.
With a Source B, a second bar under BREAK shows the frames where B really forms (from 5 % to 95 % of the grains landed). The app measures it. While it measures, the bar has a dashed border and the label ≈ FORM B. If there is a gap between the two bars, a dotted line FLIGHT joins them. If B cannot form before the end of the clip, the bar says so: make the clip longer or the flight shorter.
The bar of an Emit layer goes from Start emitting at to Stop emitting at. Drag its start and its end. With a Fade out, the ramp is drawn on the bar and has a handle that you can drag.
Labels on the lane when a part of the effect is off for that layer (Show source, Break, Form B).
A key stores a value on one frame. Between two keys, the app moves the value by itself. You can put keys on the position of Source A and Source B, on the transform of a text or 3D object, and on the lights.
All the keys are on this row. Keys of Source A are filled diamonds, keys of Source B are hollow diamonds, keys of a transform are small diamonds, keys of the lights are circles. A recorded blow is drawn as its run of frames.
Click a key: it is selected (a ring around it) and the playhead goes to it. Shift + click adds a key to the selection or removes it. Esc clears the selection.
Drag a key left or right to change its frame. Several selected keys move together. A key that you drop on another key replaces it.
Select the keys and press Delete or Backspace. Or right-click a key and choose Delete key. A blow is moved and deleted as a whole.
Right-click a key: Copy key, then Paste key on the playhead.
The bar under the panel. The export always goes from the In marker to the Out marker.
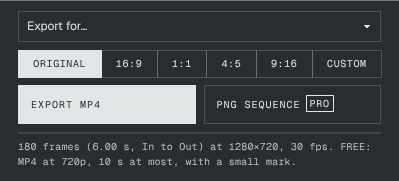
Ready-made sizes: Reels / TikTok (1080 × 1920), Instagram feed 4:5 (1080 × 1350), YouTube 1080p (1920 × 1080), YouTube 4K (3840 × 2160) and Alpha PNG sequence for editing, which sets the background to None (transparent).
The shape of the frame. Original is the shape of your photo or video (16:9 for text and 3D). Custom All settings lets you type the width and the height in 07 Output.
Renders the frames from In to Out and writes an MP4 video (H.264). A box shows the progress and has a Cancel button. If Source A is a video, the MP4 can have its sound. MP4 has no transparency: with Background None, the MP4 uses black.
Shortcut: Ctrl / ⌘ + E · needs Chrome or Edge
Tip In FREE the MP4 is 720p (short side), 10 seconds at most, with a small mark “ASHES VFX · FREE”.
Writes one PNG file for each frame. With Background: None the files have an alpha channel (transparent background), ready for After Effects, Premiere, DaVinci Resolve or Nuke. In Chrome and Edge you choose a folder and the files are saved straight into it; in other browsers you get a .zip.
Under the buttons: the number of frames, the length, the size and the frame rate of the export, and the FREE limits when they apply.
Saves the current frame as one PNG at the export size. It is in the right-click menu of the viewer.
Shortcut: Ctrl / ⌘ + Shift + S
Your files never leave your computer. Projects are stored inside your browser, on this computer.
The gear button in the header. Preferences belong to the app on this computer, not to the project.
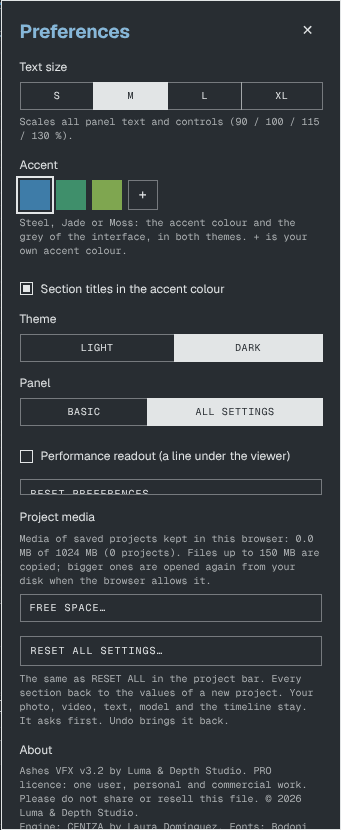
Scales all the text and the controls of the panel: S, M, L, XL (90, 100, 115, 130 %).
The accent colour and the grey of the interface, in both themes: Lilac & Mint (the default), Steel, Jade or Moss. The + is your own accent colour.
On: the titles of the sections use the accent colour.
Light or Dark. The same as the buttons in the header.
Basic or All settings. The same as the buttons in the header.
Shows a line under the viewer area (at the bottom of the timeline) with the time that the dust and the 3D take on each frame. Use it to find what makes the app slow.
Puts the preferences back to their defaults (Dark, Lilac & Mint).
Shows the space that the media of the saved projects use in this browser. Free space… deletes those copies for all the projects. The projects stay, and they will ask you to locate their files.
The same as Reset all in the project bar.
The version, the license and a link to Credits and licenses.
The search box at the top of the panel.
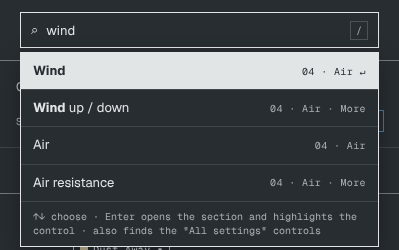
Type the name of a control, or a word about what you want (for example “wind”, “morph” or “transparent”). Choose a result: the app opens the section, and the tab if needed, and shows the control. It also finds the buttons of the project bar and the credits.
Shortcut: /
Shortcuts work when the pointer is not typing in a text field.
| Key | What it does |
|---|---|
| Space | Play / pause |
| ← → | Previous / next frame. With Shift: 10 frames |
| Home End | First / last frame |
| D | Put the Break on the current frame |
| I O | Set In / Out of the render range |
| Q | Tool: Dust origin |
| G | Tool: Move |
| T | Tool: Rotate (Text, 3D Text, OBJ) |
| Y | Tool: Scale (Text, 3D Text, OBJ) |
| L | Put light 1 under the pointer |
| V | Show / hide the selected layer |
| S | Solo the selected layer |
| H | Hide / show all the helpers of the viewer |
| F | Full screen. Esc to leave |
| / | Find a setting |
| Ctrl / ⌘ + Z | Undo |
| Ctrl / ⌘ + Shift + Z or Ctrl / ⌘ + Y | Redo |
| Ctrl / ⌘ + D | Duplicate layer |
| Ctrl / ⌘ + E | Export MP4 |
| Ctrl / ⌘ + Shift + S | Save this frame as PNG |
| Ctrl / ⌘ + Enter | In a text box: Use text |
| Delete / Backspace | Delete the selected keys (or the selected layers, when the layer list has the focus) |
| Shift + click, Ctrl / ⌘ + click | Select several layers |
| Shift + drag on the picture | Move the image |
| Alt + drag, or wheel (Move tool) | Depth Z |
| Esc | Close a menu or a window, clear the key selection, leave full screen |
| Double-click a slider name or value | Back to its default value |
Right-click opens a menu with the useful actions for the thing under the pointer. On a Mac: two-finger click or Ctrl + click. On the keyboard: Shift + F10.
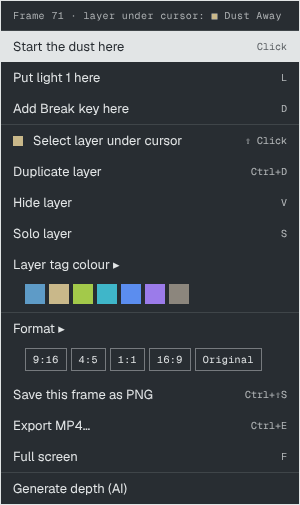 On the picture
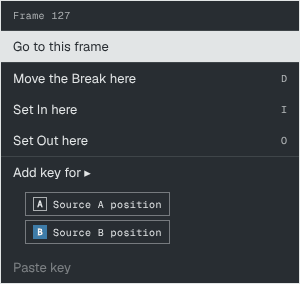 On the timeline
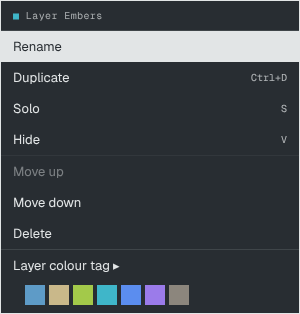 On a layer row
| Where | Actions |
|---|---|
| The picture | Start the dust here · Put light 1 here · Add Break key here · Select layer under cursor · Duplicate layer · Hide / Show layer · Solo layer · Layer tag colour · Format · Save this frame as PNG · Export MP4… · Full screen · Generate depth (AI) |
| An empty frame of the timeline | Go to this frame · Set Break here / Move the Break here · Set In here · Set Out here · Add key for ▸ (Source A position, Source B position, Transform (A), a light) · Paste key |
| The Break marker | Move the Break to the playhead · Go to the Break · Remove the Break |
| The render range | Set In on the playhead · Set Out on the playhead · Reset the render range (whole timeline) |
| A layer bar | Remove the Break · Snap its start to the playhead · Reset timing (no time shift, default duration) · Duplicate layer |
| A key | Go to this key · Delete key (or Delete the selected) · Copy key · Paste key on the playhead · Between keys ▸ (Smooth, Linear) |
| A blow | Go to this blow · Delete this blow · Delete all blows |
| A layer row | Rename · Duplicate · Solo · Hide / Show · Move up · Move down · Delete · Layer colour tag |
| A preset | Apply · Apply to all layers · Rename… · Delete · Export this preset (.json) · Save the look of this layer as a new preset… |
| A section title | Reset section · Collapse all · Expand all · Copy section settings · Paste section settings · Save the look of this layer as a preset… |
| A control | Reset this control · Copy value · Paste value · Remove key on this frame · Show in All settings |
| An empty part of the panel | Collapse all sections · Expand all sections · Show All settings / Show Basic settings |
FREE has every control. PRO removes the limits of the export.
| FREE | PRO | |
|---|---|---|
| Controls, layers, timeline, Source B, depth, 3D | All | All |
| MP4 size | 720p at most (short side) | Full size, up to 4K |
| MP4 length | 10 seconds at most | Any length |
| Mark on the picture | A small “ASHES VFX · FREE” | No mark |
| PNG sequence with alpha | — | Yes |
| Offline file for your computer | — | Yes |
| Commercial work | — | Yes |
| Price | 0 € | 29 € launch offer (59 € later). One payment, no subscription. |
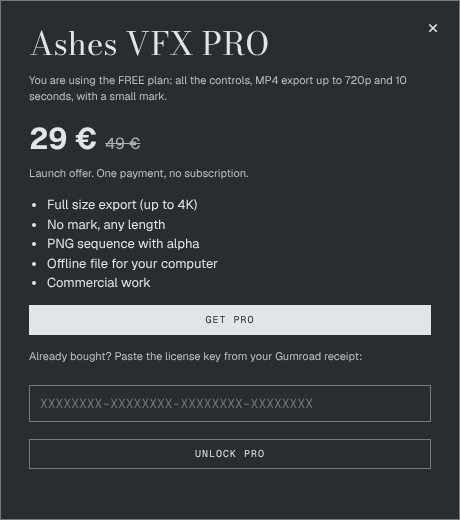
When PRO is active, the PRO window has this button. It saves the app as one .html file on your computer. Open that file, press Unlock PRO and paste your key one time.
Switches PRO off in this browser, for example before you give the computer to another person.
PRO works without the internet for 30 days. After that it needs the internet one time to renew, and it does it by itself. The license is for one user, for personal and commercial work. If the app says that the key is active on too many devices, write to laura@ldavstudio.com.
| Problem | What to do |
|---|---|
| The app is slow | Lower Dust amount (05 Dust). With a 3D source, lower Dust limit on 3D and set 3D preview quality to Half or Quarter. Hide the layers you are not working on. Raise the values again for the final export. Preferences → Performance readout shows what takes the time. |
| MP4 export does not start | MP4 export needs Chrome or Edge. Update the browser. |
| I cannot find a control | Switch to All settings in the header, or press / and type its name. Some controls appear only in one state (see the tags in this manual). |
| I move a slider and nothing changes | The value has keys and the playhead is between two keys. Go to a key, or press ◆ Key here first. |
| The black background turns to dust too | Raise Remove dark background in + Layer, or use a PNG with a transparent background. |
| The dust does not form B | Look at the bar FORM B on the timeline. Make the clip longer, or make Break duration and Flight time shorter. Check that Form B is on in 03 Effect. |
| “By depth” is not in the Direction list | It needs a depth pass. Open + Depth (Z) and load or generate one. |
| Generate depth (AI) does not work | The first time it downloads a model of about 25 MB: it needs the internet. |
| The textures of my OBJ are missing | Select the .obj, the .mtl and the texture files together, or use Folder…. Read the report under the buttons. |
| A font does not work in 3D Text | Some fonts (collections .ttc and some web fonts) cannot be turned into 3D shapes. Choose another font or load a .ttf / .otf file. |
| A project asks for its files | Press Locate… and choose the file. It happens with files over 150 MB, after an Import .json, or if the browser data was cleared. |
| My saved project is not in the list | Projects live in one browser on one computer. Use the same browser. To move a project, use Export .json. |
| PRO went back to FREE | The license needs the internet one time every 30 days. Go online and open Unlock PRO. |
| Something else | Use Chrome or Edge, reload the page and try again. If it goes on, write to laura@ldavstudio.com and say what you did and which browser you use. |
Your files never leave your computer. Photos, videos and models are opened inside your browser. Only two things use the internet: the license check of PRO and the first download of the AI depth model.
Five short walk-throughs. Each one starts from a new project (New in the project bar).
No control matches that text. Try one word, for example “wind”.